Written byJanet BahorunUpdated on Nov 25, 2025
Step-by-Step Guide to Clone System HDD to SSD for Maximum Performance
Approved byBen Lee
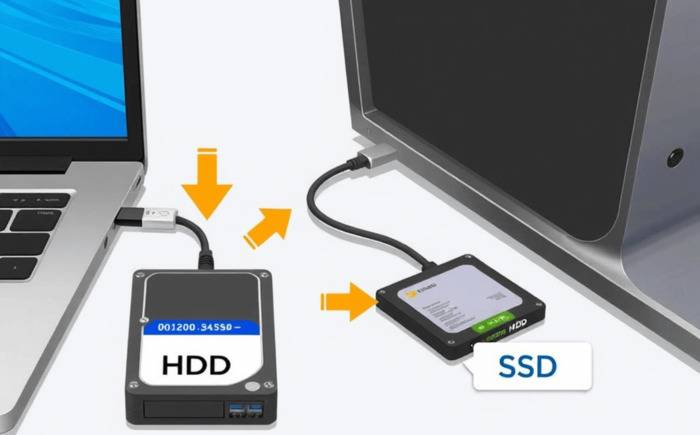
Brief introduction: Upgrading system from a traditional HDD to Solid State Drive (SSD) revitalizes your computer with faster boot times and enhanced performance. If you’re looking for a hassle-free storage upgrade while keeping your existing setup intact, you're in the right place. This guide explores how to clone your system HDD to SSD with Tatasoft Disk Clone, ensuring an effortless transition backed by our expertise in future-proof computing.
In this article
Why Clone Your System HDD to SSD?
Cloning your system from HDD to SSD offers numerous benefits. Here are a few reasons why you should consider making the switch:
1. Improved Speed and Performance
One of the most significant advantages of SSDs over traditional hard drives is their speed. SSDs offer faster boot times, quicker application launches, and overall improved responsiveness.
2. Enhanced Durability
SSDs are more durable than traditional hard drives because they have no moving parts. This makes them less susceptible to physical damage, ensuring your data remains safe.
3. Better Energy Efficiency
Another benefit of SSDs is their energy efficiency. They consume less power, which not only extends the life of your laptop or computer but also reduces your electricity bill.
4. Quieter Operation
Unlike traditional hard drives, SSDs operate silently. If you’re accustomed to the sounds of spinning disks and moving heads, this can be a pleasant change.
5. Increased Storage Space
Upgrading to a larger SSD can also provide you with more storage space. This allows you to store more applications and files without worrying about running out of space.
The Process of Cloning System from HDD to SSD
Now let’s delve into the process of how to clone your system HDD to SSD with the verified disk cloning software – Tatasoft Disk Clone for Window.
Step 1:Prepare Your SSD
- Before you begin cloning, ensure that your SSD is properly connected to your computer. You can do this internally (inside your desktop or laptop) or externally via a USB to SATA adapter.
Step 2: Download and Install Tatasoft Cloning Software
- After installation, lunch Tatasoft and choose Disk Clone to effortlessly migrate your system from HDD to SSD with our user-friendly disk cloning software.
Step 3: Select the HDD and SSD for cloning
1) Choose your source drive (the current system HDD) and the target drive (the SSD).
2) Check sector by sector cloning option if you want to make a 1:1 replica.
3) Verify the selected disk is correct, as cloning will erase all data on the target drive.

Step 4: Edit Partition Layout on destination SSD
① Resize partitions: Customize the partition configuration on the target SSD according to your needs.
② Enable SSD optimization: Enabling this feature ensures that the SSD is optimized for performance after cloning.
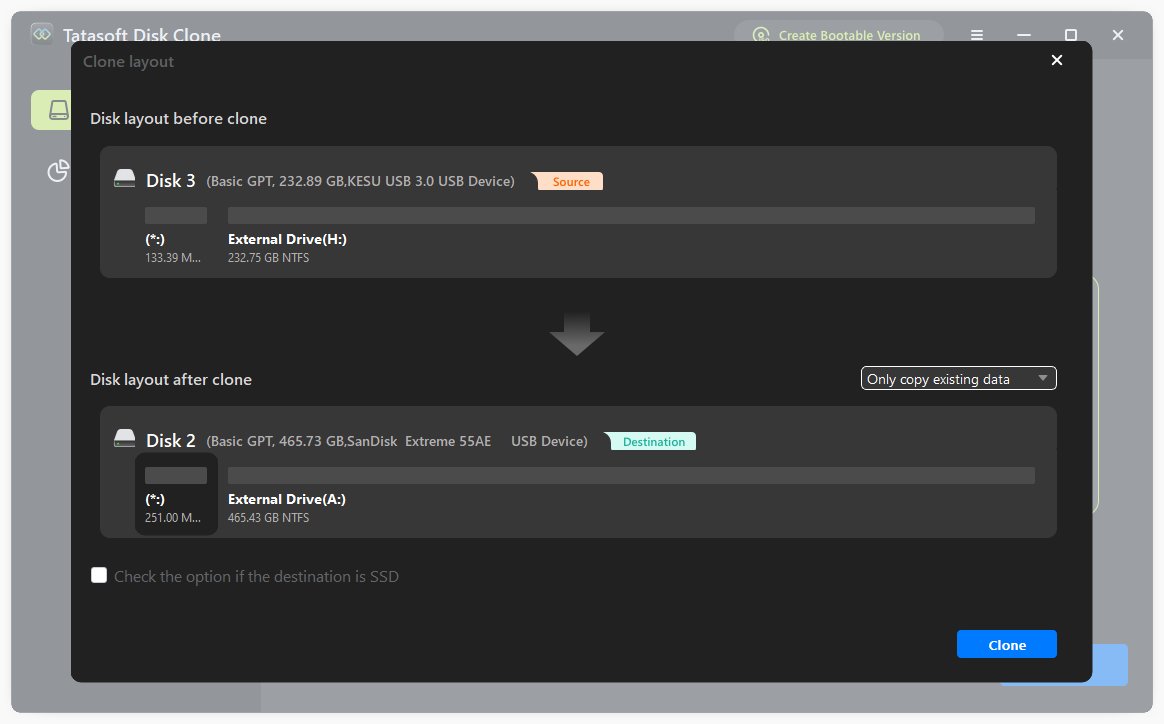
Alt text: Edit partition layout on SDD
Step 5: Start to cloning your system HDD
- Click the 'Clone' button to begin the cloning process. Depending on the size of your data and the speed of your drives, this may take some time. Be patient and avoid interrupting the process.
- If your system is in use, the software will restart the computer and automatically enter boot mode for cloning.

Once the cloning is complete, verify that all your data has been successfully copied to the SSD. You should check file accessibility and ensure that applications run correctly.
Step 6: Set the SSD as the Boot Drive
After cloning, you'll want to set your SSD as the primary boot device. You can do this by:
- Restarting your computer and entering BIOS/UEFI settings (usually by pressing F2, F10, or DEL during boot).
- Navigating to the boot order settings and selecting your SSD as the first boot option.
- Saving your changes and exiting BIOS/UEFI.
Reboot your computer and enjoy the improved speed and performance of your newly cloned SSD. If everything has gone well, your operating system and applications should load much faster.
Tips for a Successful System HDD to SSD Migration
1. Backup Important Data: Before initiating the cloning process, ensure that you back up any critical files or data. Although the cloning process is generally safe, it's always good to have a backup just in case.
2. Check the Disk Space: Make sure that your SSD has enough space to accommodate all the system data from your HDD. If your SSD is smaller than your current drive, consider deleting unnecessary files or transferring data to an external storage device before cloning.
3. Disable Security Software: Temporarily disable any security software during the cloning process. Some security programs can interfere with the operation of cloning software.
4. Use a Reliable Power Source: If you’re using a laptop for cloning, ensure it is plugged in to avoid any interruptions during the cloning process due to a power outage or battery failure.
5. Keep Your Cloning Software Updated: Regular updates of Tatasoft cloning software may add new features or improvements, making the cloning process smoother and more efficient.
Expert Insight:
When upgrading system from an HDD to an SSD, one key factor to consider is the cloning process's impact on overall system performance. Tatasoft Disk Clone for Windows, can significantly improve the efficiency of your transition. It ensures seamless OS migration, preserving system settings and files while boosting performance- no data loss or issues post-clone.
Use Tatasoft's advanced cloning algorithm to ensure clone integrity and SSD optimization during transfer. This delivers peak SSD performance instantly post-clone, enabling a seamless upgrade experience. Remember, a careful and well-executed cloning process is the foundation of a successful system upgrade!
Troubleshooting Common System Cloning Issues
While cloning your system HDD to SSD should be a straightforward process, some common issues may arise. Here are some troubleshooting tips:
1. Cloning Failures: If the cloning process fails, ensure that both your source and target drives are properly connected. Additionally, checking for errors on the source drive using disk management tools can help rectify issues.
2. SSD Not Detecting: If your SSD is not detected after installation, check all physical connections. Ensure that the drive is properly seated in the SATA connector. If using an external adapter, try a different USB port.
3. Boot Issues After Cloning: If your computer does not boot from the SSD after cloning, re-enter the BIOS/UEFI settings to confirm the boot order. Ensure that your SSD is listed as the first boot device.
4. Not All Data Cloned: If certain files or applications did not transfer, ensure that you selected the correct source and target drives during the cloning process and that there was sufficient space on the SSD.
Conclusion
Cloning your system HDD to SSD eliminates the hassle of manual data migration while unlocking next-level speed. By following our detailed guide, you can achieve a seamless OS migration experience that will transform the way you use your device. With Tatasoft disk cloning software, you not only gain improved speed and efficiency but also the reliability and durability that SSD technology provides.
Don't wait to unleash the full potential of your computer. Download Tatasoft cloning software today and experience the rewards of a faster, more efficient system!
Related Articles
- Nov 27, 2025Essential Techniques for Cloning Your Hard Drive in Windows 11
- Nov 16, 2025Replace Hard Drive Without Reinstalling Windows: Step-by-Step Guide
- Nov 23, 2025Complete Guide to Clone SSD to SSD Effortlessly
- Nov 16, 2025How to Clone Windows 11 to a New SSD without reinstalling?
- Nov 27, 2025Step-by-Step Guide to Cloning a Hard Drive to a Smaller SSD
- Aug 24, 2025How to Copy a Partition in Windows 7/8/10/11 Safely?

a dedicated data recovery writer, has been a pivotal part of the Tatasoft team for over 4 years. Before this, he enriched IBM for 13 years as a Backup and Recovery: TSM Subject Matter Expert. A proud alumn...
Read full bio

This article has been approved by Brett. Bett's dedication to excellence and his comprehensive knowledge of Windows and Mac technologies make her an essential part of any technical writing team. With a career marked by continuous learning and adaptation to new technologies, Bett remains at the forefront of the ever-evolving tech landscape.