Written byJanet BashorunUpdated on Dec 17, 2025
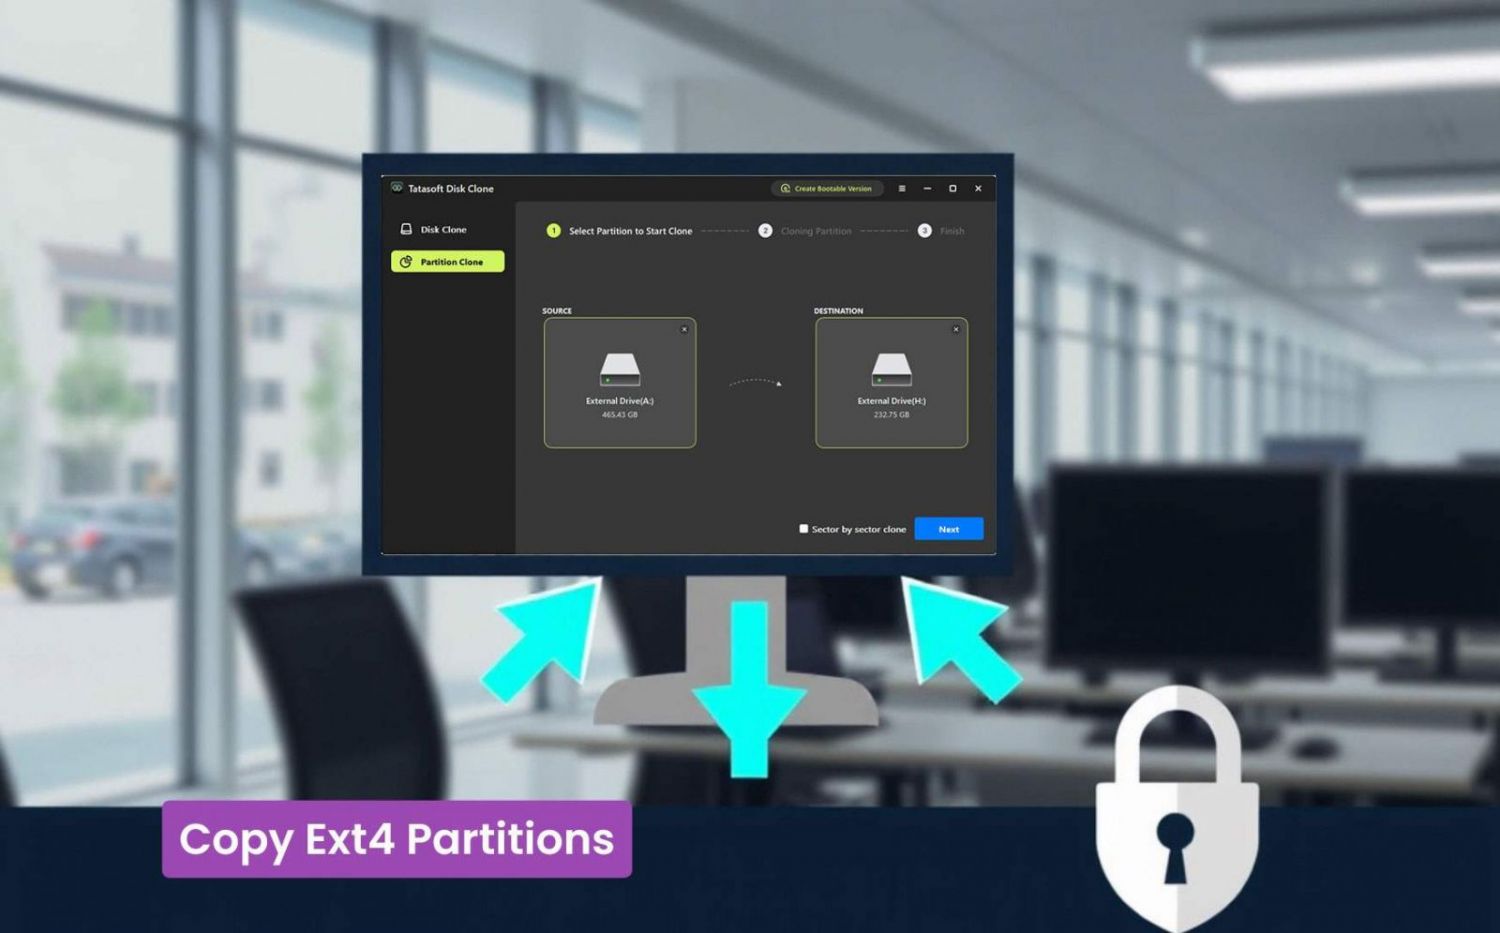
How to Successfully Copy Ext4 Partitions on Windows? 3 Methods to Try
Approved byBen Lee
Brief introduction: Copying Ext4 partitions on Windows 11/10/8/7/Vista is an important process for data migration, backup, and disk upgrades while preserving Linux file permissions and structures. Whether you're looking to migrate to new hardware, or create test environments, knowing how to copy Ext4 partitions effectively can save you time and help prevent data loss. In this article, we will explore three methods for successfully copying Ext4 partitions, highlighting best practices and Ext4 cloning tools like Tatasoft Disk Clone.
In this article
Why Copy Ext4 Partitions?
1. Data Security and Backup
Regularly copying your Ext4 partitions is vital for data security. In case of system failures or accidental deletions, having a backup can be invaluable.
2. System Migration
When upgrading to new hardware or changing Linux systems, copying your Ext4 partition allows for a seamless transition without losing your existing settings, applications, or files.
3. Testing and Development
For developers and testers, copying Ext4 partitions provides a quick way to replicate environments without affecting the original setup.
Preparing to Copy Ext4 Partitions
When migrating a Linux partition in a dual-boot setup with Windows, the process involves several key steps and considerations:
1. Check Available Disk Space
Before starting, ensure that your destination drive has enough space for the Ext4 partition you wish to copy. You can check disk space using commands or system utilities.
2.Install Disk Clone Software or tools required for installation
For a streamlined copying process, install recommended Tatasoft cloning software or create a WinPE bootable media for Tatasoft Disk Clone to clone an Ext4 volume.
3. Backup Critical Data
Always back up important files on the target disk before proceeding. This minimizes the risk of data loss on the target drive during the copying process.
4. Cleanup your Ext 4 partition
Remove unnecessary data from the ext4 partition before cloning can improve cloning efficiency and save disk space.
Method 1: Copying Ext4 Partitions Using Tatasoft Disk Clone
Step 1: Launch Tatasoft Disk Clone and switch to Partition Clone
Step 2: Select Source and Destination partitions
- ① Identify the Ext4 partition you want to copy as the source.
- ② Choose the destination drive or partition where you want to copy the data.
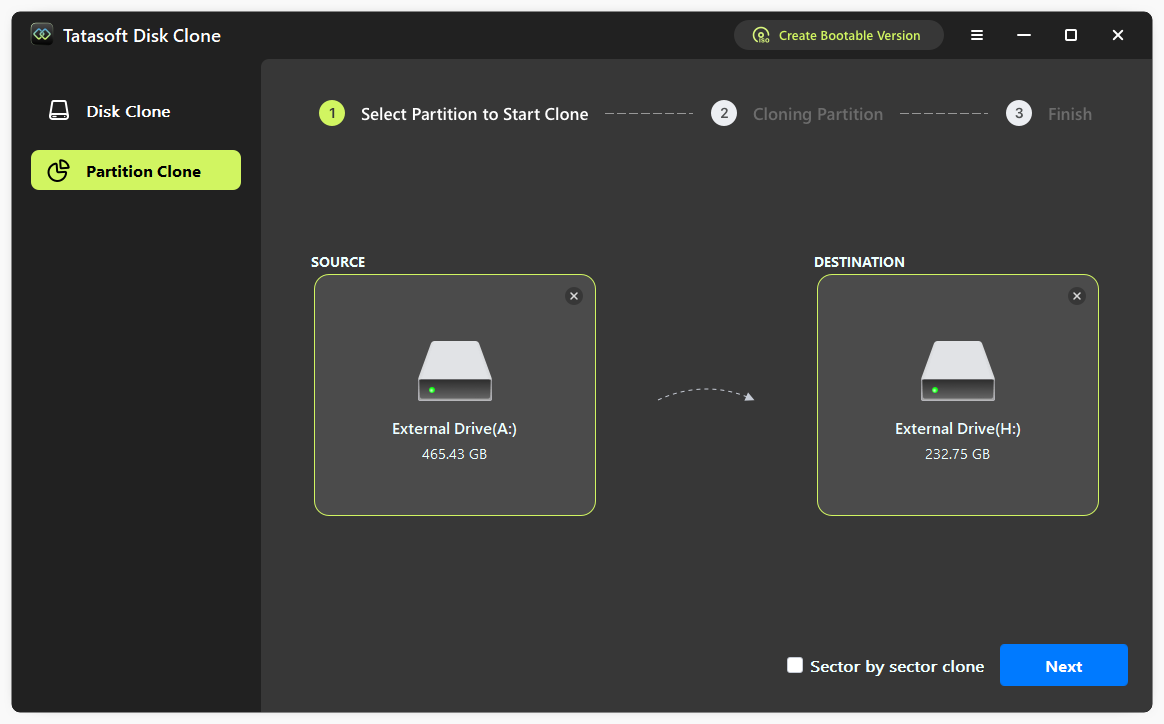
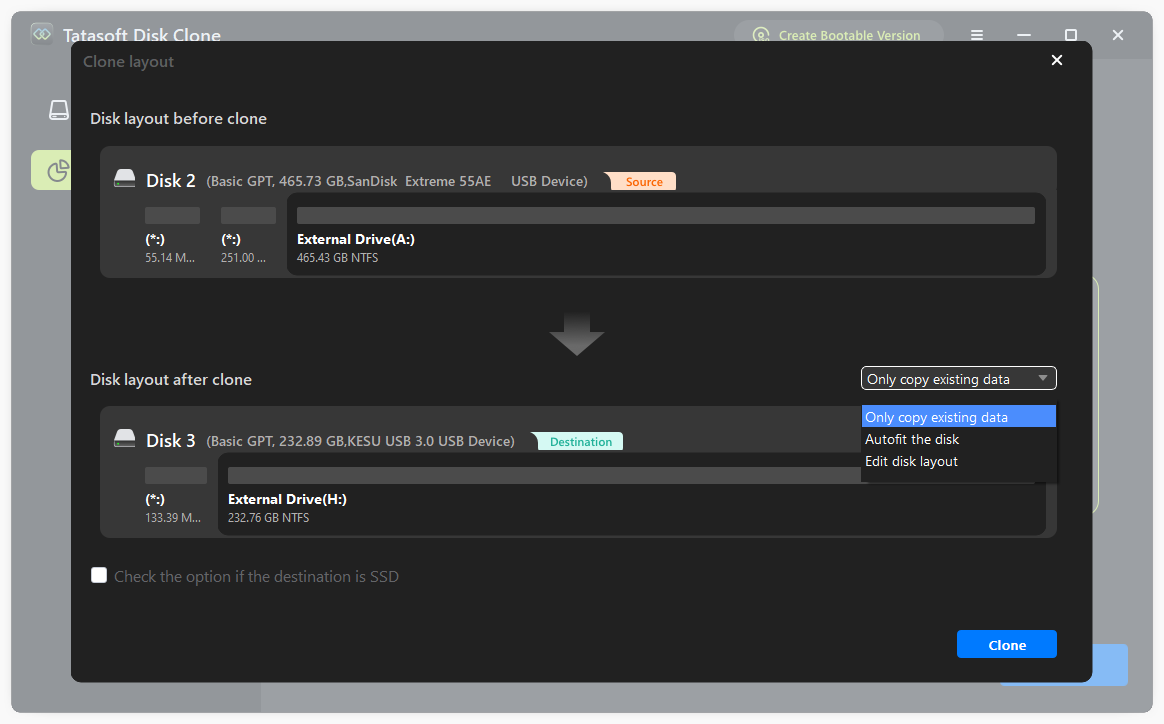
Step 3: Configure Cloning Settings
- ① Configure any additional options, such as resizing the partition or verifying data post-copy.
- ② Decide on the cloning method: Partition Clone for an exact copy or File Clone for selective files.
- ③ Click the "Clone" button to begin copying the Ext4 partition.
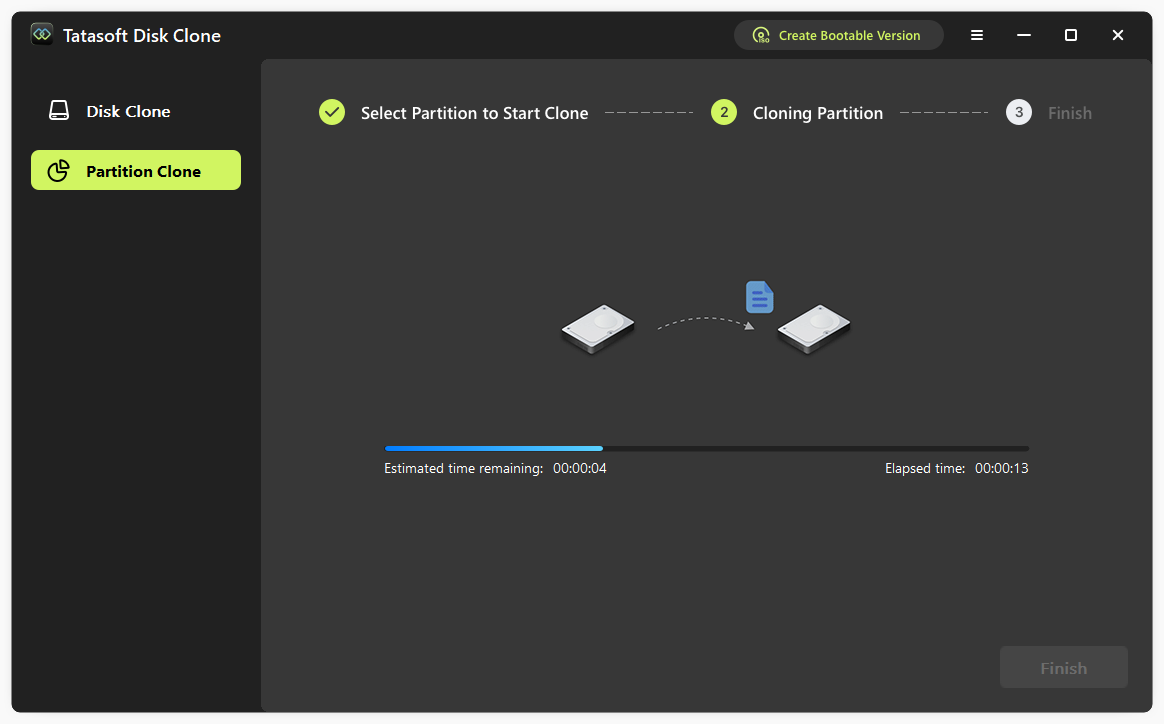
Step 4: Initiate the copy process and verify the EXT 4 copy
- ① Monitor the cloning progress through the software interface.
- ② Once the copying process is complete, check the destination drive to ensure all data on the Ext 4 drive has been copied successfully.
Expert Insight: When copying Ext4 partitions, always check the copied data for errors. Use tools to compare the source and destination after copying. Software like Tatasoft can automatically verify the data, ensuring no mistakes were made. This helps prevent data loss and keep systems working correctly. Adding this check to your process avoids problems later, especially in important tasks like development or business operations. Always verify your data!
Method 2: dd Command to Copy Ext4
Windows does not natively support the dd command (a Linux tool for low-level disk operations), you can download the ported version from unofficial projects like dd for Windows, extract it, and run the command via CMD with administrator privileges.
For users comfortable with the terminal, you can use the 'dd' command to copy an Ext4 partition:
```bash
sudo dd if=/dev/sda1 of=/dev/sdb1 bs=64K conv=noerror,sync ```
This command copies data from '/dev/sda1' (source) to '/dev/sdb1' (destination) while sets the read/write chunk size to 64KB. Be cautious, as improper use can lead to data loss.
Method 3: Using GParted to clone Ext 4 Drive
GParted is a free, open-source partition editor that supports cloning Ext4 partitions. While not as user-friendly as Tatasoft, GParted provides a visual interface for managing partitions. Below are the step-by-step instructions for copying an Ext4 partition to another disk or unallocated space. Here are the steps to clone Ext 4 partition with GParted:
- ① Download GParted Live ISO from the official website gparted.org and create a bootable USB/CD.
- ② Boot from the Live Media (USB/CD) by changing the boot order in BIOS/UEFI12
- ③ Launch GParted after booting into the live environment.
- ④ Unmount the Target Partition (if mounted) to avoid errors.
- ⑤ Right-click the Source Partition and select "Copy".
- ④ Right-click Unallocated Space on the destination disk and choose "Paste".
- ④ Adjust Size (Optional) if the destination space is smaller than the source (GParted allows resizing during paste).
- ⑧ Click "Apply" to execute the copy operation
Ext4 Cloning: 3 Methods Compared
When it comes to cloning Ext4 partitions, Tatasoft stands out among various tools available in the market. Here's a brief comparison with some popular alternatives:
| Tatasoft Disk Clone for Window | DD Command-Line | GParted |
|---|---|---|
|
Pros
|
Pros
|
Pros
|
|
Cons
|
Cons
|
Cons
|
In summary, while there are 3 options available for cloning Ext4 partitions, Tatasoft's combination of ease of use, features, and support makes it a compelling choice for both novice and experienced users.
Troubleshooting Ext4 Partition Copying Errors
1. Drive Recognition Problems
If the source or destination drives are not recognized, check all physical connections and ensure they are properly mounted.
2. Insufficient Space Warnings
If you receive warnings about insufficient space, consider freeing up space on the destination drive or selecting a larger drive.
3. Copying Errors
If the copying process fails, restarting Tatasoft and attempting the operation again often resolves the issue. For persistent problems, consult Tatasoft’s support resources.
Conclusion
Successfully copying Ext4 partitions is a vital skill for anyone managing data, particularly in environments utilizing the Ext4 filesystem. Unlike NTFS, EXT4 is Linux's native file system, requiring specialized tools for seamless cloning. By following the steps outlined in this guide and utilizing Tatasoft Disk Clone for Windows, you can ensure a smooth and reliable partition copying process while enhancing the performance and reliability of your systems.
Related Articles
- Feb 09, 2026Migrate Windows 11 to SSD with Ease - Boost Your PC Performance
- Jan 01, 2026How to Seamlessly Clone an SD Card on Windows 10/11?
- Mar 06, 2026Best 5 Solutions to Clone HDD to HDD
- Dec 17, 2025Disk Cloning vs. Disk Imaging: Which Backup Solution is Right for You?
- Dec 17, 2025Don't Lose Your Data; Clone Drives with Bad Sectors Successfully
- Mar 06, 2026Your Go-To Alternative to Clonezilla for Disk Cloning

A dedicated technical writer at Tatasoft with over four years of specialized expertise in computing technology. She crafts actionable, user-centric content for tech niches, specializing in disk cloning, data management, and video solutions for Windows and Mac.
Read full bio

This article has been approved by Ben Lee. Ben's dedication to excellence and his comprehensive knowledge of Windows and Mac technologies make him an essential part of any technical writing team. With a career marked by continuous learning and adaptation to new technologies, Ben remains at the forefront of the ever-evolving tech landscape.