Written byJanet BashorunUpdated on Feb 06, 2026
A Step-by-Step Guide on How to Clone Mac Hard Drive to USB Flash Drive
Approved byBen Lee
Brief introduction: Cloning your Mac's hard drive to a USB flash drive is the most effective way to create a 1:1 functional replica of your entire system. Unlike a simple file copy, a true clone includes your operating system, hidden library files, applications, and personal settings. This comprehensive guide will walk you through the process using the professional Tatasoft Disk Clone for Mac to ensure a seamless experience when you clone Mac hard drive to USB flash drive.
In this article
Why Clone Your Mac Hard Drive USB Flash Drive?
Cloning your system to a USB flash drive offers unique advantages that standard cloud backups or Time Machine cannot match:
- Instant Bootable Recovery: The primary benefit is the ability to create a bootable clone of Mac. If your internal drive fails or your system won't start, you can plug in your USB drive, hold the Option key, and boot directly into your familiar workspace.
- Seamless Hardware Upgrades: When moving to a new machine, you can clone Mac hard drive to a USB drive first, then use it to migrate your entire digital life to the new hardware without reinstalling everything from scratch.
- High Portability & Security: A USB flash drive is small enough to carry in your pocket. This allows you to carry your entire Mac OS environment with you, providing a "portable office" that you can run on any compatible Mac.
- Safe System Testing and Sandboxing: If you need to clone Mac OS drive for testing purposes, a USB clone serves as a perfect sandbox. You can test new macOS updates or experimental software on the USB copy first to ensure they won't compromise your primary internal storage.
- Compatibility with Modern Systems: Specialized tool ensures that even the most complex file structures are preserved. For instance, you can successfully clone mac to an external SSD or USB stick while maintaining all system permissions and APFS volume roles.
To achieve these results with 100% data integrity, we recommend using a specialized Mac disk clone software like Tatasoft Disk Clone for Mac. This tool is designed to handle the complexities of Apple’s file systems, ensuring a fast and reliable cloning experience for users of all skill levels.
Preparing for the Mac Hard Drive Cloning Process
Before you start cloning your Mac hard drive, there are a few essential steps to take:
- Choose the Right USB Flash Drive: Select a high-quality USB drive from a reputable brand to minimize the risk of hardware failure.
- Verify Storage Capacity: Your USB flash drive must have sufficient capacity, ideally being at least as large as the total data currently stored on your Mac. For example, 100 GB of data requires at least a 100 GB USB drive.
- Backup Critical Files: Before starting, ensure you back up any existing files on the target USB flash drive to another location. The cloning process will format the destination drive, meaning all current data on the USB will be permanently erased.
- Install Tatasoft Disk Clone: Download Tatasoft Disk Clone for Mac and complete the installation. For the first-time setup, please grant Full Disk Access to Tatasoft Disk Clone for Mac in your System Settings > Privacy & Security > Full Disk Access to ensure a successful cloning process.
How to Clone Mac Hard Drive to a USB Flash Drive?
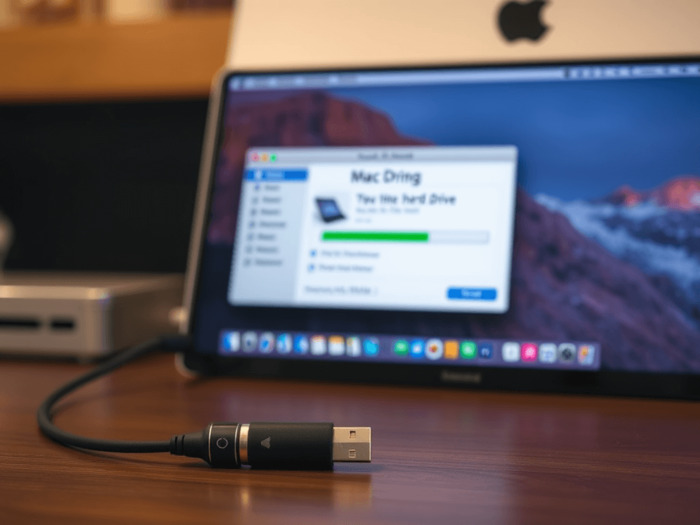
Step 1: Connect Your USB Flash Drive
Plug your USB flash drive directly into a port on your Mac. Avoid using unpowered USB hubs if possible.

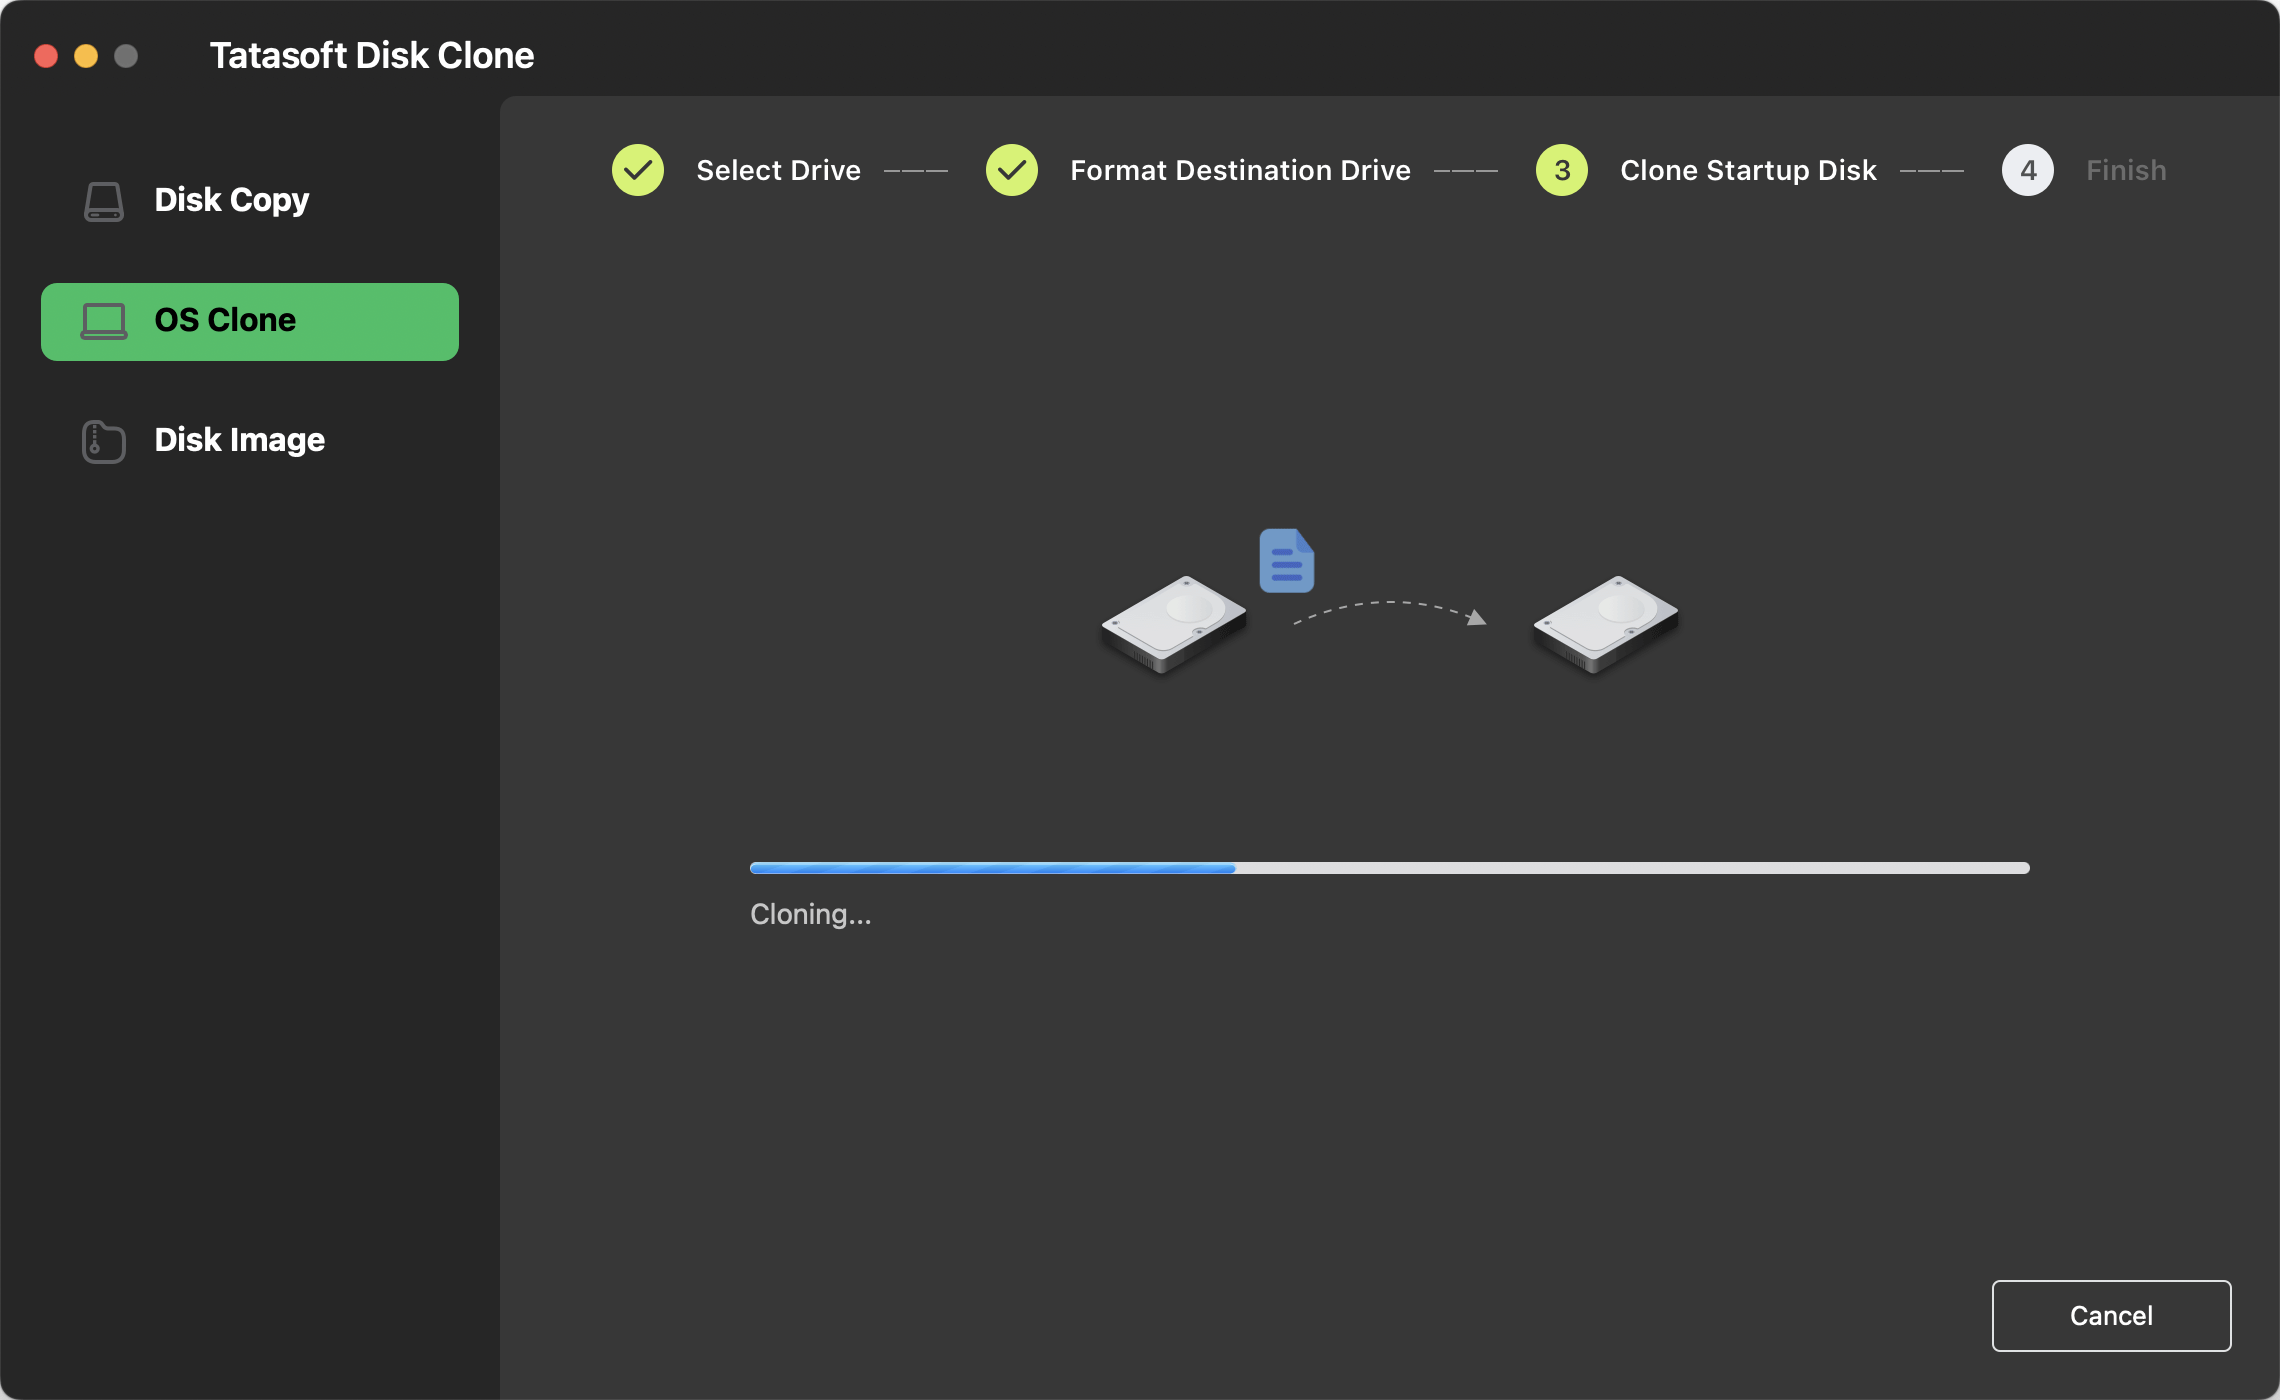
Step 2: Launch Tatasoft Disk Clone for Mac and select OS Clone to copy the entire internal startup disk.
Step 3: Choose the Destination Drive
- Select your USB flash drive as the destination drive. By default, your Mac’s internal startup disk is selected as the source in OS Clone.
- Again, double-check that you are choosing the correct drive to prevent overwriting any important data.

Step 4: Start the cloning process
- Click on the “Clone Now” button to conform format the target USB flash drive and begin the cloning process.
- You can monitor the progress bar to see the real-time status of the transfer. The total time required depends on the volume of data being cloned.
Once the cloning process is complete, you will receive a notification. Safely eject the USB flash drive from your Mac to maintain data integrity.
After completion, try booting from the USB drive to confirm it is fully functional if you copy the macOS:
1. Connect the Drive Plug your cloned USB drive directly into a port on your Mac.
2. Enter Boot Options:
- For Apple Silicon (M-series): Shut down your Mac. Press and hold the Power button until you see "Loading startup options."
- For Intel Macs: Shut down your Mac. Press the Power button, then immediately press and hold the Option (Alt) ⌥ key.
3. Select the USB Drive A screen will appear showing all available bootable volumes. Use the arrow keys or your mouse to select the USB drive (usually marked with a yellow icon).
4. Confirm and Boot Press Return (Enter) or click the upward arrow beneath the drive icon. Your Mac will now begin booting from the cloned drive.
Pro-Tip: If you want your Mac to boot from this USB every time it starts up, go to: System Settings > General > Startup Disk, select the USB drive, and click Restart.
Common Issues and Solutions
While cloning your Mac hard drive to a USB flash drive is usually a smooth process, you may encounter some issues. Here are a few common problems and their solutions:
- USB Drive Not Recognized: Double-check the physical connection, try an alternative USB port, and ensure the drive is properly formatted.
- Process Failure: Restart the software and verify that both the source and destination drives have sufficient space and are functioning correctly.
- Data Corruption Suspected: Use a disk utility tool to check both drives for errors before attempting the clone again.
Conclusion
Cloning your Mac hard drive to a USB flash drive is an essential skill for effective backups and system migrations. By following the comprehensive steps outlined in this guide, you can ensure that all your files, applications, and settings are preserved with minimal hassle.
Utilizing Tatasoft Disk Clone for Mac not only simplifies the cloning process but also enhances it with features like fast cloning speeds and an intuitive interface, making it suitable for users of all skill levels. It is fully compatible with the latest macOS versions and hardware. you can seamlessly clone macOS 26 Tahoe to an external hard drive.
Related Articles
- Jan 28, 2026How to Create a Bootable Clone of Your Mac
- Jan 11, 20263 Methods to Clone a Mac OS Drive
- Jan 29, 2026Easily Clone Your Mac Hard Drive to an External SSD
- Jan 29, 2026How to Clone Your MacBook Pro Hard Drive?
- Jan 27, 2026The Effective Solution for Cloning NTFS Drives on Mac
- Jan 21, 20264 Methods to Clone an External Hard Drive to Another on Mac

A dedicated technical writer at Tatasoft with over four years of specialized expertise in computing technology. She crafts actionable, user-centric content for tech niches, specializing in disk cloning, data management, and video solutions for Windows and Mac.
Read full bio

This article has been approved by Ben Lee. Ben's dedication to excellence and his comprehensive knowledge of Windows and Mac technologies make him an essential part of any technical writing team. With a career marked by continuous learning and adaptation to new technologies, Ben remains at the forefront of the ever-evolving tech landscape.