Written byJanet BashorunUpdated on Mar 05, 2026
Brief introduction: Cloning your HDD to an NVMe Solid State Drive (SSD) for Windows 11/10 can revolutionize your computing experience. By upgrading to an NVMe SSD, you’ll benefit from significantly improved speed, reliability, and efficiency, making it a smart choice for enhancing OS performance. This guide will walk you through the entire process of cloning HDD to an NVMe SSD, ensuring a smooth transition while maintaining data integrity. We will also highlight the advantages of using Tatasoft disk cloning software, making HDD upgrade as seamless as possible.
In this article
Understanding the Benefits of NVMe SSDs
Before diving into the HDD cloning process, it's crucial to understand why NVMe SSDs are a preferred choice over HDDs on Windows:
- 1. Speed: NVMe SSDs are much faster than traditional HDDs. This leads to quicker boot times, faster file transfers, and overall improved system responsiveness.
- 2. Durability: SSDs have no moving parts, making them more resistant to physical shock and less prone to mechanical failure compared to HDDs.
- 3. Energy Efficiency: SSDs consume less power than HDDs, which can enhance battery life in laptops.
- 4. Noise Reduction: SSDs operate silently, eliminating the noise associated with spinning disks in HDDs.
- 5. Compact Size: NVMe drives are often smaller and lighter than traditional HDDs, allowing for more efficient use of space in your device.
Preparing for the HDD Cloning Process
Before you begin the process of cloning your HDD to an NVMe SSD in Windows 11/10, there are 5 steps you should take to prepare:
1. Backup Your Data
Always start with a complete backup of your data on the destination NVMe SSD if it has. This precaution ensures that if the target drive will be erased during the cloning process, your important files remain safe.
2. Choose the Right HDD Cloning Software
Selecting the right disk cloning software is vital for a successful cloning process. Tatasoft Disk Clone for Windows is highly recommended due to its user-friendly interface and powerful features that facilitate the cloning of HDDs to NVMe SSDs seamlessly for Windows 11/10/8/7/Vista.
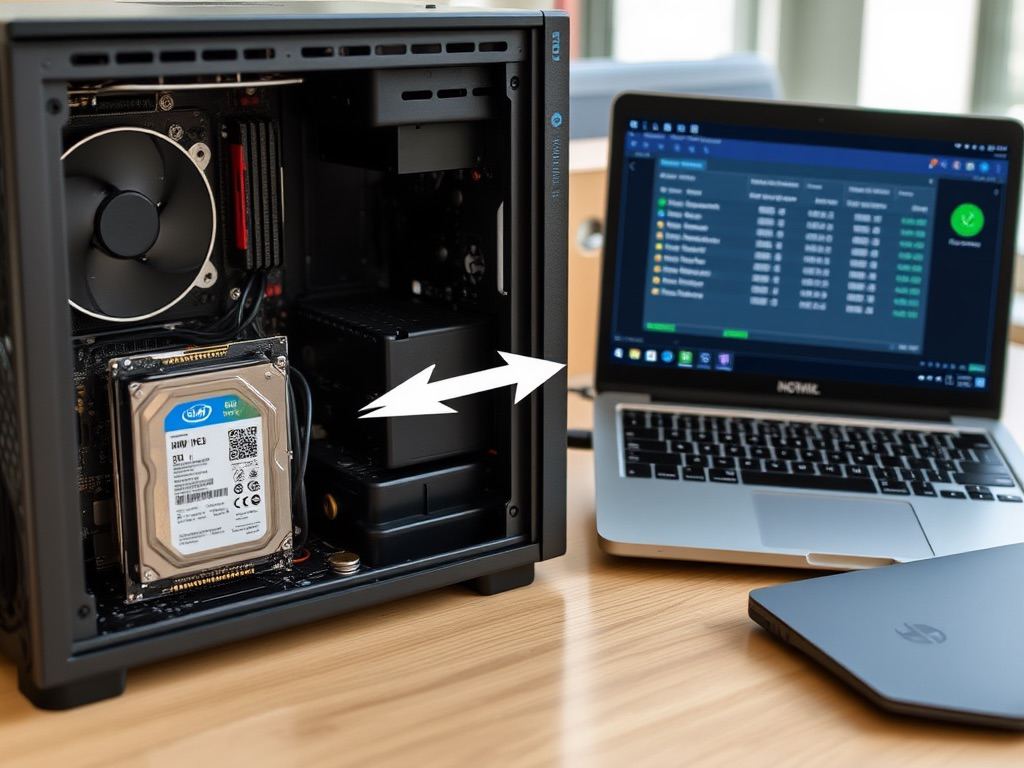
3. Install the NVMe SSD
Physically install the NVMe SSD into your computer. Make sure to follow the manufacturer's instructions for installation, ensuring that the drive is securely connected to the motherboard.
4. Ensure Enough Space
Make sure that the NVMe SSD has enough space to accommodate all the data from your HDD.
5. Clean up the HDD
If necessary, consider cleaning up unnecessary files on your source HDD to free up space and improve cloning efficiency.
Step-by-Step Guide to Clone HDD to NVMe SSD
Step 1: Install the NVMe SSD
- ① Power down your computer: Unplug it and wait for a few minutes.
- ② Open the case: Use a screwdriver to remove the side panel of your computer.
- ③ Locate the M.2 slot: Find the M.2 slot on your motherboard, which is where the NVMe SSD will be installed.
- ④ Insert the NVMe SSD: Align the notch on the SSD with the key in the M.2 slot and gently insert it at a 30-degree angle. Secure it with a screw.
- ⑤ Close the case: Reattach the side panel and reconnect your computer.
Step 2: Download and Install Tatasoft Disk Clone, then Launch it
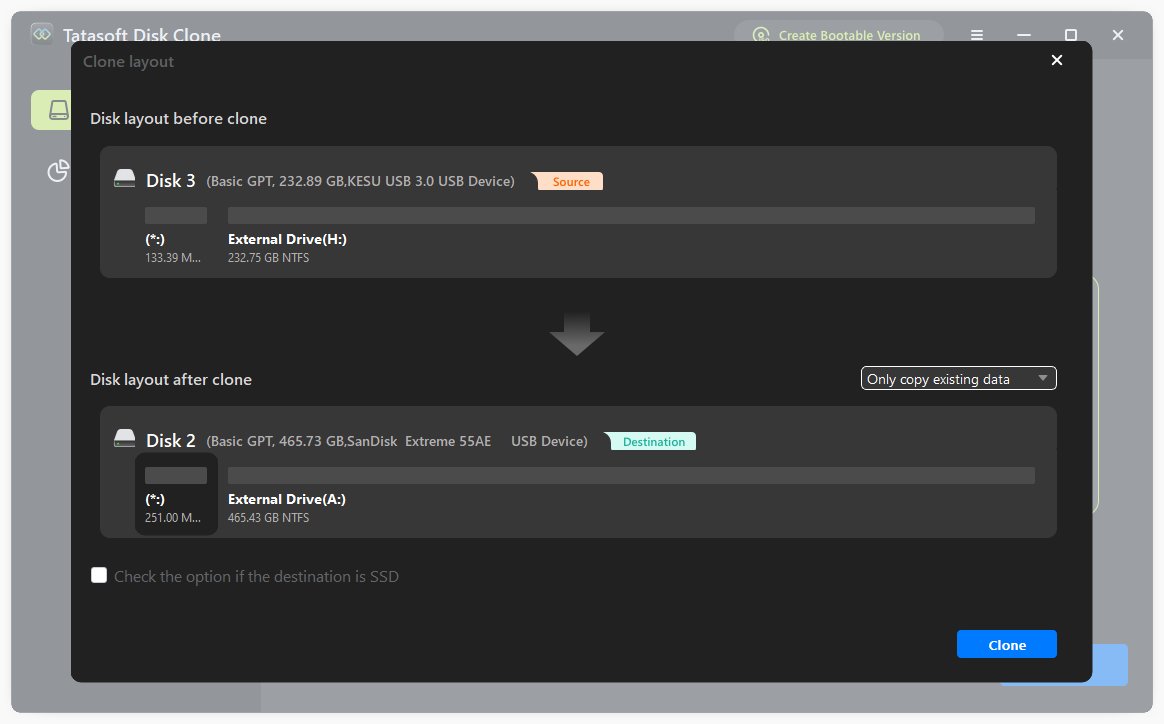
Step 3: Switch to Disk Clone and Select Disks to Clone
- ① Select the HDD as the source drive: Choose your existing HDD that you want to clone.
- ② Select the NVMe SSD as the destination drive: Choose the newly installed NVMe SSD as the destination for the cloned data.
- ③ Select cloning method: Choose between sector-by-sector cloning (check the box before sector-by-sector cloning) or quick cloning (by default). Sector-by-sector ensures a complete copy, while quick cloning only copies used space.

Step 4: Configure NVMe SSD Cloning Options
- ① Adjust partition sizes: If your NVMe SSD is smaller than the HDD, Tatasoft allows you to resize partitions during the cloning process.
- ② Enable SSD optimization: Enabling this feature ensures that the SSD is optimized for performance after cloning.
Step 5: Start the HDD Cloning Process
- ① Review your selections: Double-check that the source and destination drives are correct.
- ② Click 'Clone' Begin the cloning process. This may take some time, depending on the amount of data being transferred.

Step 6: Change Boot Order in BIOS
If you are cloning a system disk to NVMe SSD, to boot from your new NVMe SSD, you must change the boot order in your BIOS settings as below:
- ① Enter BIOS: Restart your computer and press the designated key (usually F2, F10, or Delete) to enter the BIOS.
- ② Change boot priority: Navigate to the boot menu and set the NVMe SSD as the first boot device.
- ③ Save and exit: Press F10 to ave your changes and exit the BIOS.
After rebooting, your system should now boot from the NVMe SSD. Enjoy your new NVMe SSD and you’ll notice improved performance and faster load times for applications and games.
Expert Insight: When cloning an HDD to an NVMe SSD, data integrity is paramount to prevent corruption or loss. Use cloning software with built-in verification - this feature cross-checks source and destination data post-cloning, ensuring byte-perfect transfer. Tools like Tatasoft often include such safeguards, minimizing risks from incomplete or faulty copies. Additionally, back up critical data beforehand as a fail-safe, preserving your files even if the cloning process encounters issues.
After Cloning: NVMe SSD Performance Setup
After successfully cloning your HDD to NVMe SSD, consider the following:
1. Enable TRIM Support
To maintain performance over time, ensure that TRIM support is enabled or check the box before "check the option if the destination is SSD" during the cloning process. This feature allows the OS to inform the SSD which blocks of data are no longer considered in use, helping to manage unused data blocks effectively.
2. Update Firmware
Check the manufacturer's website for any firmware updates for your NVMe SSD. Keeping the firmware updated can improve performance and ensure compatibility with your system.
3. Monitor SSD Health
Use monitoring software to keep an eye on the health of your NVMe SSD. This can help you catch any potential issues early, ensuring the longevity of the drive.
Fixing Common HDD to NVMe SSD Cloning Issues
While cloning your hard disk to NVMe SSD is generally straightforward, you might encounter some issues. Here are common problems and their solutions:
1. Insufficient Space on the Target Drive
If the NVMe SSD does not have enough space for the data being cloned, you may need to delete unnecessary files from the source HDD before cloning.
2. Cloning Process Fails
If the cloning process fails, ensure that:
- Both drives are properly connected.
- The software is up to date.
- You have administrative privileges on your computer.
3. Boot Issues After Cloning
If your computer fails to boot from the NVMe SSD after cloning:
- Check the BIOS settings to ensure the SSD is set as the primary boot device.
- Revisit the cloning options and confirm that the "Optimize for SSD" feature was enabled.
Conclusion
Cloning your HDD to an NVMe SSD is an excellent way to enhance your computer's performance and storage capabilities. By following this comprehensive guide, you can ensure a smooth and successful HDD to SSD cloning process while leveraging tools like Tatasoft disk cloning software for optimal results.
Understand the benefits, prepare adequately, and follow the detailed steps provided to make the transition to an NVMe SSD seamless. Experience improved speed, efficiency, and reliability with modern storage technology. Utilize Tatasoft Disk Clone to simplify your HDD upgrade today!
Related Articles
- Feb 07, 2026Replace Hard Drive Without Reinstalling Windows: Step-by-Step Guide
- Dec 17, 2025Speed Up Your PC in 3 Steps by Migrating Your OS to SSD
- Feb 10, 2026How to Seamlessly Copy Your Windows Installation to an SSD
- Dec 17, 2025How to Clone A Laptop Hard Drive without Data Loss in Windows 10/11?
- Jan 01, 2026How to Seamlessly Clone an SD Card on Windows 10/11?
- Jan 20, 2026How to Copy Partition to Another Drive via CMD: A Complete Guide

A dedicated technical writer at Tatasoft with over four years of specialized expertise in computing technology. She crafts actionable, user-centric content for tech niches, specializing in disk cloning, data management, and video solutions for Windows and Mac.
Read full bio

This article has been approved by Ben Lee. Ben's dedication to excellence and his comprehensive knowledge of Windows and Mac technologies make him an essential part of any technical writing team. With a career marked by continuous learning and adaptation to new technologies, Ben remains at the forefront of the ever-evolving tech landscape.