Written byJanet BashorunUpdated on Feb 10, 2026
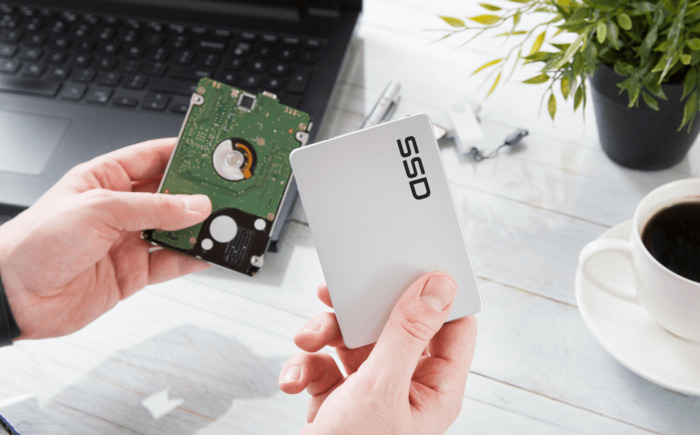
Brief introduction: Is your computer feeling sluggish? To copy your Windows installation to an SSD is the single most effective way to breathe new life into your PC. This upgrade provides significantly faster boot times, quicker application launches, and a more responsive user experience compared to traditional HDDs. By using Tatasoft Disk Clone, you can achieve this migration seamlessly without the hassle of reinstalling your operating system, apps, or drivers.
In this article
Why Upgrade Your Windows Installation to an SSD?
Upgrading Window installation from an HDD to a Solid State Drive (SSD) offers transformative benefits:
1. Enhanced Speed and Performance
One of the primary reasons to copy your Windows installation to an SSD is the dramatic improvement in speed. SSDs can read and write data much faster than HDDs, leading to:
- Faster Boot Times: Your operating system can load in seconds instead of minutes.
- Quicker Application Launches: Programs open almost instantly, enhancing your productivity.
2. Increased Reliability
SSDs are more reliable than HDDs due to their lack of moving parts. This results in:
- Lower Failure Rates: SSDs are less prone to mechanical failures, which helps protect your data.
- Durability: They can withstand shocks and vibrations, making them ideal for laptops and mobile devices.
3. Improved Power Efficiency
SSDs consume less power than HDDs, contributing to:
- Longer Battery Life: This is especially beneficial for laptops, allowing for extended use between charges.
- Lower Energy Costs: For desktop users, reduced power consumption can lead to lower electricity bills.
It is important to understand the technical nuances of your Windows migration. For instance, knowing the difference between disk cloning vs. disk imaging can help you decide the best way to preserve your boot sectors. If you need an exact copy for immediate use, cloning is right for you.
Preparing for the Windows Installation Migration
1. Backup Your Data
The destination SSD will be formatted during the process. Securely back up any existing files on that drive to an external hard drive or cloud storage first.
2. Choose the Right SSD
Selecting the appropriate SSD is essential for a successful migration. Consider the following factors:
- Capacity: Select an SSD with enough capacity to hold your current data plus at least 20% free space for optimal performance. If you are upgrading an existing small SSD, you may want to learn how to clone SSD to a larger SSD.
- Speed: Look for SSDs with high read/write speeds for optimal performance.
- Brand Reputation: Brands like Samsung, Crucial, and Western Digital are known for reliability and performance.
3. Download Professional Disk Cloning Software
For a seamless migration experience, download Tatasoft Disk Clone for Windows to simplify the process and ensure that your new SSD is a perfect replica of your old drive.
How to Copy Your Windows Installation to an SSD
Step 1: Install Your SSD
- Physically Install the SSD:
For Desktops: For desktops, connect the SSD to a SATA port; for laptops, it is highly recommended to connect your new SSD as an external drive (using a SATA-to-USB adapter) to perform the cloning first. Once the migration is complete, you can then physically install the SSD into the laptop.
- Initialize the New SSD:
For brand-new SSDs, perform an initialization first so that Windows can properly detect and access the drive. Open Disk Management, right-click the "Unallocated" space on the new drive, and select Initialize Disk. Special setups might require you to clone dynamic disk to SSD.
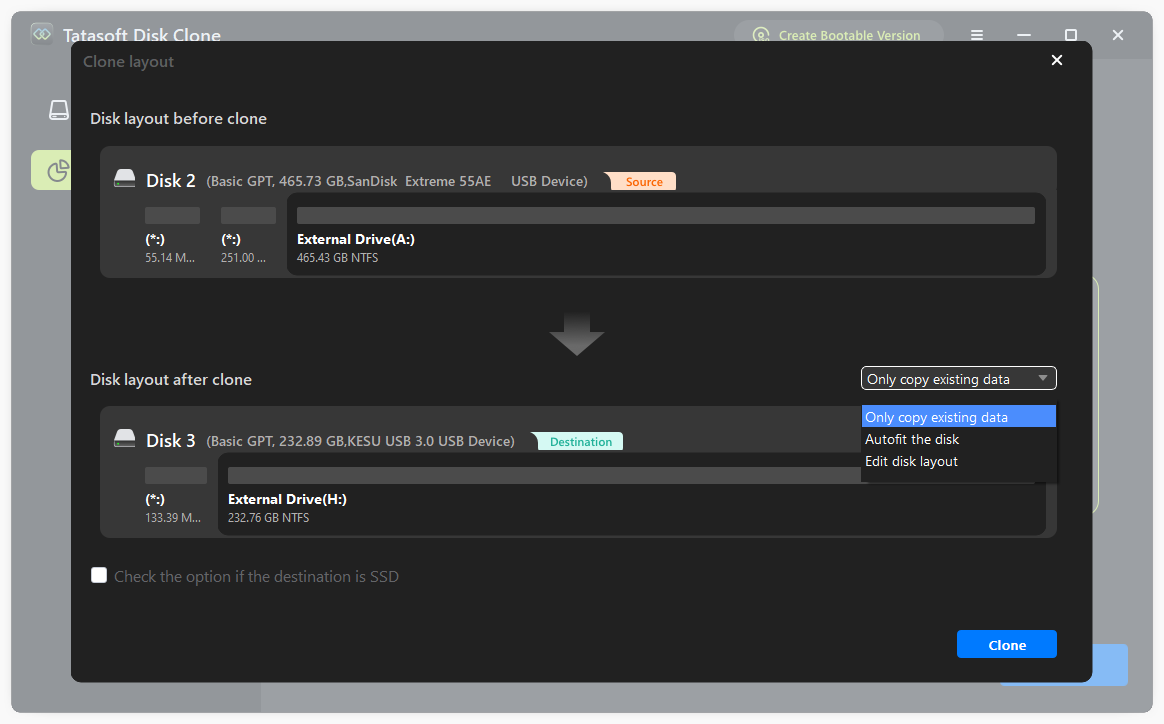
Step 2: Select the Source and Destination Drives for Cloning
- Open Tatasoft and choose your current Windows installation disk as the source drive and the new SSD as the destination drive.

Step 3: Start the Cloning Process
- Edit Disk layout: You can resize the partitions on the destination SSD as needed or just select to copy as the source drive.
- Begin Cloning: Click on the "Clone" button to start the process. Tatasoft will create a complete copy of your Windows installation, including all files, applications, and settings.
- Monitor the Progress: The software will display the progress of the cloning operation. This process may take some time, depending on the amount of data being transferred.
Tips: Tatasoft Disk Clone includes an "Optimize for SSD" option (enable TRIM and 4K Alignment). Ensure this is checked to align the partitions correctly, which is vital for SSD longevity and speed.
Step 4: Booting from the New SSD
Once finished, restart your PC and enter the BIOS/UEFI (usually by pressing F2, F12, or Del). Change the boot order so the SSD is the Primary Boot Device. Save and exit; your computer should now load Windows in seconds.
Tips: If you are on the latest OS, follow our guide to move Windows 11 installation to a new drive. Using an older version? See how to clone Windows 10 to SSD.
Post-Migration & Long-Term Maintenance
After successfully migrating your system, follow these essential maintenance steps to preserve your SSD’s peak performance and extend its lifespan.
- Enable TRIM Support: TRIM is vital for maintaining SSD speed as it allows the OS to inform the drive which data blocks are no longer in use. Note: If you selected the "Optimize for SSD" option during the cloning process using Tatasoft Disk Clone, the software automatically triggers 4K alignment and ensures that TRIM is enabled in Windows, saving you from manual configuration.
- Enable Write Caching: To further boost performance, go to Windows Device Manager and enable "Write Caching" for your new SSD. This improves data transfer speeds, especially for heavy tasks. However, ensure your system has a stable power source (like a laptop battery or UPS) to prevent data loss during sudden outages.
- Disable Disk Defragmentation: Unlike traditional HDDs, SSDs do not have moving parts and do not benefit from defragmentation. In fact, defragging an SSD causes unnecessary wear. Windows usually identifies SSDs and disables this automatically, but it is wise to double-check that "Optimize Drives" is set to "Trim" instead of "Defragment."
- Keep Sufficient Free Space: For optimal efficiency and to allow wear-leveling algorithms to work correctly, always maintain at least 10-20% of free space on your SSD. A drive that is nearly full will experience significant performance drops.
- Regularly Monitor SSD Health: Use professional tools like CrystalDiskInfo or the SSD manufacturer’s utility to monitor S.M.A.R.T. attributes. Keeping an eye on the "Remaining Life" and temperature helps you catch potential hardware issues before they lead to data loss.
Conclusion
To copy your Windows installation to an SSD is undoubtedly the most impactful upgrade you can perform to modernize an aging PC. By switching from a mechanical drive to solid-state technology, you eliminate system bottlenecks, drastically reduce boot times, and enjoy a near-instant response from your favorite applications. Using Tatasoft Disk Clone makes this transition risk-free and remarkably simple.
Whether you are performing a routine upgrade, need to replace a failing hard drive or change to a new computer, Tatasoft ensures that your OS, drivers, and personalized settings remain perfectly intact and bootable. Don't let a sluggish system hold back your productivity or gaming experience. Take the leap toward a faster, more efficient computing environment today.
Related Articles
- Feb 02, 2026How to Clone HDD to USB Drive on Windows?
- Jan 20, 2026How to Copy Partition to Another Drive via CMD: A Complete Guide
- Dec 28, 2025How to Clone HDD to M.2 SSD without Data Loss?
- Feb 11, 2026The Ultimate Guide to Cloning GPT Disk in 2026
- Mar 09, 2026Three Simple Steps to Clone Your Failing Hard Drive to a New Disk
- Jan 28, 2026Ultimate Guide to Moving Your Windows 11 Installation to a New Drive

A dedicated technical writer at Tatasoft with over four years of specialized expertise in computing technology. She crafts actionable, user-centric content for tech niches, specializing in disk cloning, data management, and video solutions for Windows and Mac.
Read full bio

This article has been approved by Ben Lee. Ben's dedication to excellence and his comprehensive knowledge of Windows and Mac technologies make him an essential part of any technical writing team. With a career marked by continuous learning and adaptation to new technologies, Ben remains at the forefront of the ever-evolving tech landscape.