Written byJanet BashorunUpdated on Dec 28, 2025
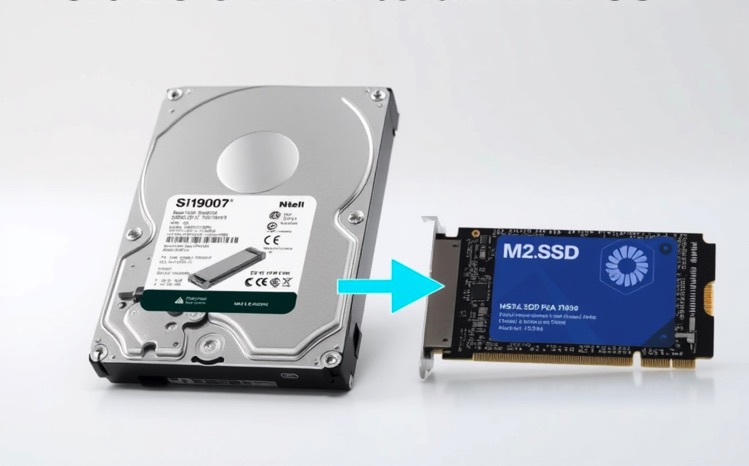
Brief introduction: Clone HDD to M.2 SSD is a critical process for anyone seeking to upgrade their storage for enhanced speed and performance. As technology advances, traditional hard drives (HDDs) are increasingly being replaced by M.2 solid-state drives (SSDs), which offer superior speed and reliability. This guide will walk you through the process of cloning your HDD to an M.2 SSD using Tatasoft's disk cloning software and essential tips for a smooth HDD migration without data loss.
In this article
Benefits of Cloning HDD to M.2 SSD
Hard Disk Drives (HDDs) and M.2 Solid State Drives (SSDs) serve the same fundamental purpose: data storage. However, they differ significantly in design, functionality, and performance.
1. HDD (Hard Disk Drive)
- Mechanics: HDDs utilize mechanical platters that spin at high speeds (commonly 5400 or 7200 RPM) to read and write data. This mechanical nature makes them susceptible to physical damage.
- Storage Capacity: HDDs typically offer large storage capacities at a lower cost, making them a popular choice for bulk data storage.
- Speed: Due to their mechanical components, HDDs are slower in read/write speeds compared to SSDs, resulting in longer load times for applications and files.
2. M.2 SSD (Solid State Drive)
- Mechanics: Unlike HDDs, M.2 SSDs have no moving parts. They rely on NAND flash memory, which allows for much faster data access speeds.
- Performance: M.2 SSDs deliver significantly improved read/write speeds (up to several GB/s) and lower latency, leading to a more responsive system.
- Form Factor: M.2 drives connect directly to the motherboard, often making them more compact than traditional SSDs that use SATA connections.
Cloning your HDD to an M.2 SSD presents numerous benefits, including:
- Enhanced Speed and Performance: Transitioning to an M.2 SSD will drastically improve boot times, application load times, and overall system responsiveness.
- Durability: SSDs are more robust as they have no mechanical parts, making them less prone to failure caused by physical shocks or drops.
- Energy Efficiency: M.2 SSDs consume less power than HDDs, contributing to longer battery life in laptops.
- Simplified Migration: Cloning allows users to transfer their entire system, including the operating system, applications, and files, without needing to reinstall or configure settings manually.
Preparing for Cloning HDD to M.2 SSD
Before you begin to clone your HDD to M.2 SSD, it's essential to prepare adequately:
- Backup Your Data: Before any disk migration, it is wise to back up important files on your destination disk to an external drive or a cloud storage solution to prevent data loss during the cloning process.
- Check Hardware Compatibility: Make sure your motherboard supports M.2 SSDs, and ensure the M.2 drive is properly installed.
- Install a reliable disk cloning software: Download and install Tatasoft Disk Clone for Windows. It is a powerful yet user-friendly disk cloning tool, enabling seamless data migration from HDDs to SSDs. Key features include cloning entire HDDs or specific partitions as needed, while ensuring data integrity remains uncompromised during the process.
- Clean up the source HDD: Remove junk files and unnecessary application will save your cloning time and disk space.
Step-by-Step Guide to Clone HDD to M.2 SSD
Here’s how to clone your SSD using Tatasoft Disk Clone:
Step 1: Connect your M.2 SSD to your computer
Step 2: Launch Tatasoft Disk Clone and select "Disk Clone"
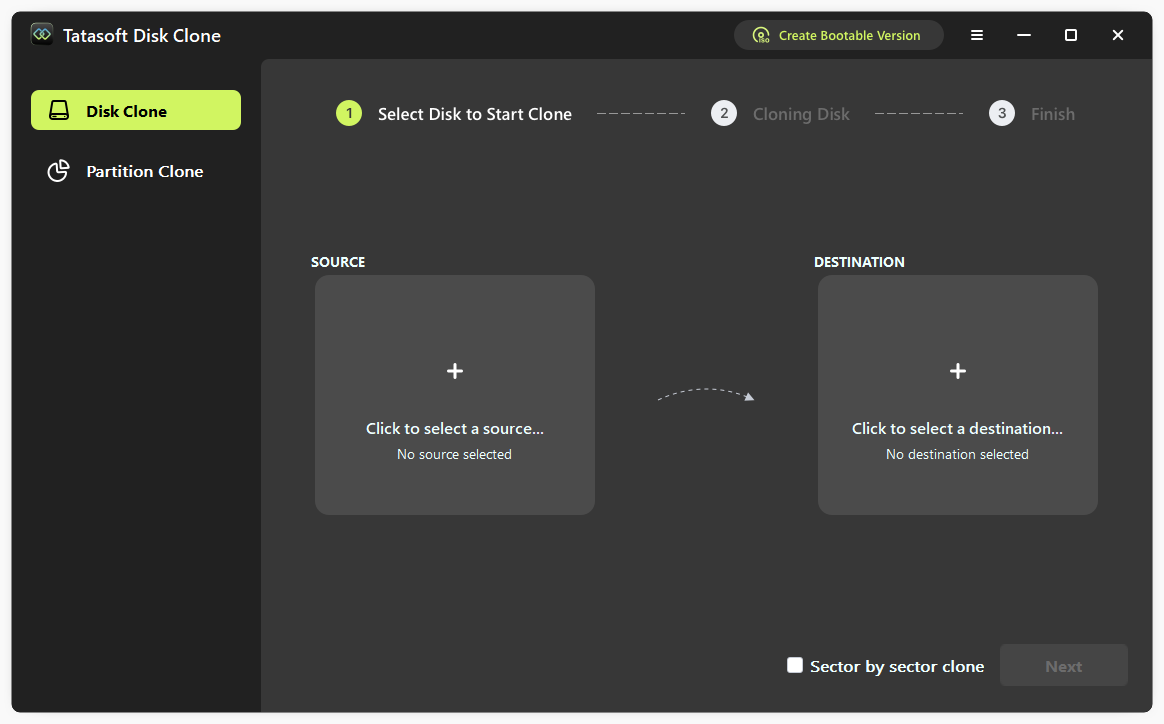
Step 3: Select the Source (HDD) and Destination Drive
1). On the main menu, choose your HDD as the source drive for the cloning operation by clicking + on the left. Ensure you select the correct disk to avoid unintentional data loss.
2). Select your M.2 SSD as the target drive by clicking + on the right side. Ensure that you are selecting the right drive, as all data on the target drive may be overwritten.

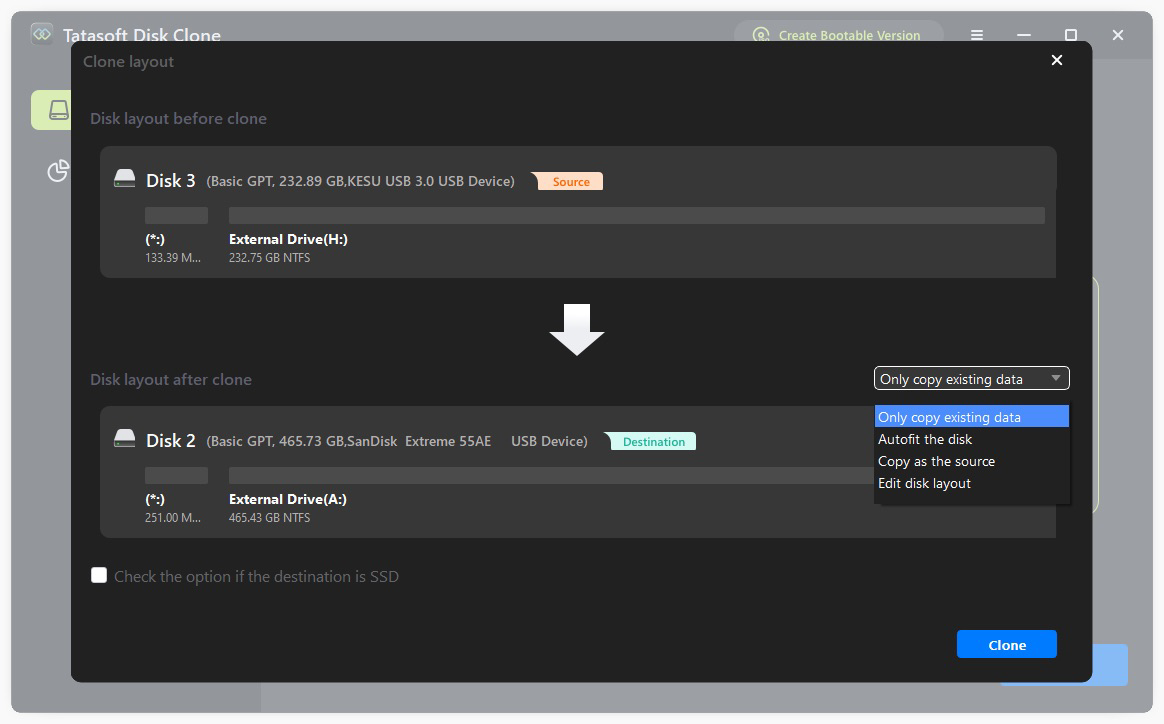
Step 4: Configure HDD Cloning Options
① Resize partitions: Customize the partition configuration on the target M.2 SSD according to your needs.
② Enable SSD optimization: Enabling this feature optimizes the SSD for peak performance post-cloning.
③ After configuring the options, confirm your selections and initiate the cloning process by clicking the "Clone" button.
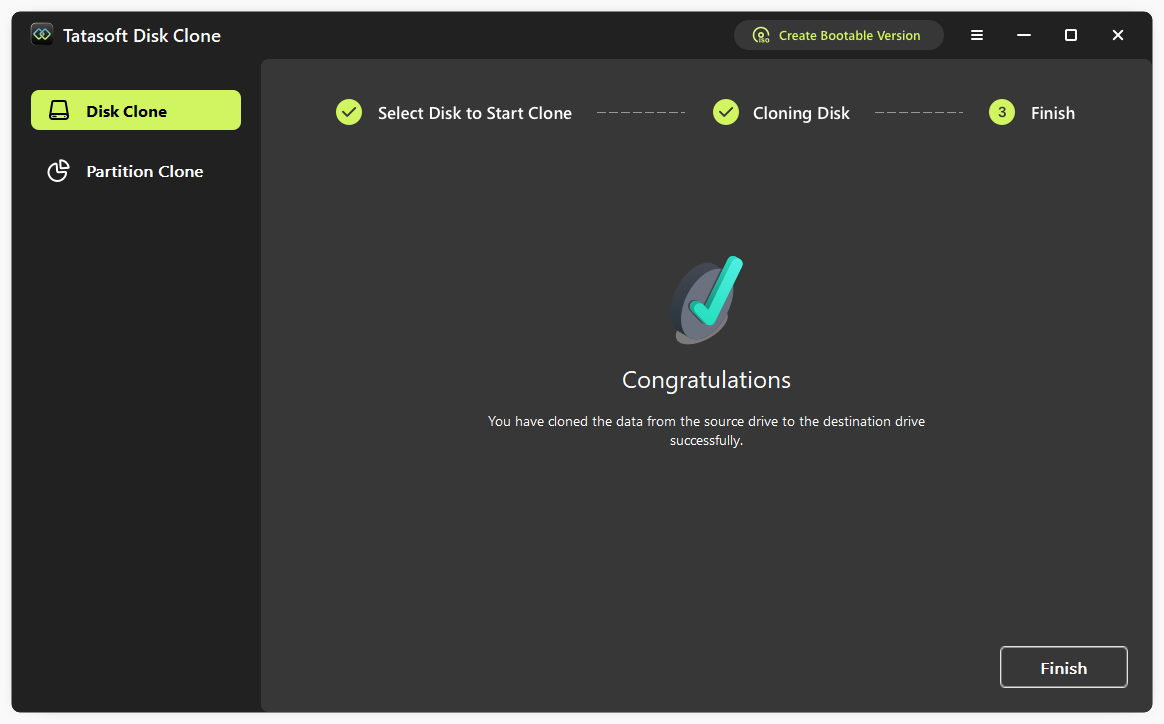
The software will begin the cloning process, transferring data from the HDD to the M.2 SSD. Tatasoft will display the progress of the cloning process. It’s important not to interrupt the process. Once the cloning process is complete, you can also manually check the files on your M.2 SSD to ensure everything has transferred properly.
Boot from the M.2 SSD (if applicable)
If cloning system HDD to SSD, to boot your system from the new M.2 SSD, you may need to change the boot order in the BIOS settings. Restart your computer > enter the BIOS setup (commonly by pressing a key like F2, DEL, or Esc during startup) > change to Boot menu > prioritize the M.2 SSD as the primary boot device.
Best Practices for Cloning HDD to M.2 SSD
To ensure successful cloning from HDD to M.2 SSD while maintaining data integrity, consider the following best practices specifically tailored for cloning:
- Enough Disk Space on the M.2 SSD: Ensure that the M.2 SSD has enough capacity to store the contents of the HDD. If your HDD has more data than the SSD can handle, consider deleting unnecessary files or upgrading to a larger SSD.
- Keep Software Updated: Always use the latest version of Tatasoft or any cloning software you choose to ensure you have the latest features and bug fixes.
- Choose the Right Drive Configuration: Ensure that your M.2 SSD is compatible with the motherboard. Not all motherboards support every M.2 SSD, especially when it comes to NVMe vs. SATA interface.
- Backup Important Data: Always back up critical files from your HDD before cloning. While cloning should preserve your data, backing up helps prevent data loss in case of any unforeseen issues.
- Verify Connections: Ensure that both your source HDD and target M.2 SSD are properly installed and detected by your system. Check connections and compatibility to avoid errors during cloning.
- Minimize Other Operations: During the cloning process, avoid using your computer for other tasks. This helps reduce the chances of errors and ensures that the cloning runs smoothly without interruptions.
- Test the Clone After Completion: Once cloning is complete, verify that the M.2 SSD is functioning correctly by checking that all files and applications are accessible. If you're using it as a boot drive, verify that your system boots successfully.
Conclusion
Cloning your HDD to an M.2 SSD is a powerful way to enhance your computer’s performance, ensuring faster load times, improved responsiveness, and greater reliability. With Tatasoft Disk Clone, this process is straightforward and efficient. It's compatible with a wide range of storage devices: clone HDD to NVMe SSD, or copy HDD with bad sectors without interruption. By following the steps outlined in this guide and implementing best practices, you can successfully upgrade your storage system and enjoy the numerous benefits of an M.2 SSD.<
Start transforming your storage experience. Upgrade from your HDD to an M.2 SSD seamlessly and experience the incredible speed and performance improvements that await you.
Related Articles
- Jan 15, 2026A Complete Guide on How to Move Windows 10 to Another Drive Without Reinstalling
- Dec 17, 2025How to Clone Your Disk to Larger Disk Seamlessly?
- Dec 17, 2025Three Simple Steps to Clone Hard Drive to SSD with Operating System
- Dec 17, 2025The Ultimate Guide to Thunderbolt 4 HDD to SSD Cloning
- Jan 15, 2026How to Migrating Windows 10 to Smaller SSD?
- Dec 17, 2025How to Clone SSD to a Larger SSD?

A dedicated technical writer at Tatasoft with over four years of specialized expertise in computing technology. She crafts actionable, user-centric content for tech niches, specializing in disk cloning, data management, and video solutions for Windows and Mac.
Read full bio

This article has been approved by Ben Lee. Ben's dedication to excellence and his comprehensive knowledge of Windows and Mac technologies make him an essential part of any technical writing team. With a career marked by continuous learning and adaptation to new technologies, Ben remains at the forefront of the ever-evolving tech landscape.