Written byJanet BashorunUpdated on Dec 17, 2025
Don't Lose Your Data; Clone Drives with Bad Sectors Successfully
Approved byBen Lee
Brief introduction: Cloning a drive with bad sectors is essential for data recovery and protection. Bad sectors can lead to data loss and system instability, making it crucial to address these issues promptly. In this article, we will explore how to effectively clone a drive that has bad sectors using Tatasoft Disk Clone. We’ll cover the importance of this process, the steps involved, best practices, and tips for optimizing your cloning experience. Let’s dive in!
In this article
What Are Bad Sectors?
Bad sectors are sections of a hard drive that have become damaged and are no longer able to store data reliably. They can occur due to various reasons, including physical damage, wear and tear, or manufacturing defects. When a drive has bad sectors, it can lead to data corruption, system crashes, and other issues that affect the overall performance of the computer. Bad sectors are classified into two types:
- Logically Bad Sectors: These sectors can occur due to file system corruption or logical errors. If your drive has only logically bad sectors, you can clone it directly from Windows using Tatasoft Disk Copy without any extra steps.
- Physically Bad Sectors: These are sectors that have become damaged or unreadable due to physical wear and tear. These are permanent and require sector skipping during cloning. If your hard drive contains physical bad sectors and fails to boot the OS, the cloning process must be conducted in WinPE mode by using a bootable disk created with Tatasoft Disk Copy.
Why Clone Your Hard Drive with Bad Sectors?
Cloning a drive with bad sectors allows you to create a backup of your data while avoiding the risks associated with using a failing drive. By cloning the drive, you ensure that all recoverable data is transferred to a new, healthy drive, safeguarding against potential data loss.
Choose a reliable disk cloning software to copy HDD with bad sectors
When it comes to cloning a drive with bad sectors, Tatasoft Disk Clone for Windows offers several advantages of cloning hard drive in Windows 11, 10, 8, 7, Vista.
Key Features of Tatasoft Disk Clone
- Sector-by-Sector Cloning: Tatasoft Disk Clone allows for sector-by-sector cloning, which means it can copy every sector of the drive, while automatically bypassing bad sectors. This mechanism guarantees cloning success and maximizes recoverable data transfer.
- User-Friendly Interface: Designed for both beginners and advanced users, Tatasoft simplifies the cloning process with an intuitive interface.
- Fast Cloning Speed: Tatasoft optimizes the cloning process for speed, minimizing downtime during the transition.
- Data Verification: The verification feature ensures that the copied data is intact and reliable.
How to Clone a Drive with Bad Sectors?
Method 1. Cloning Drives with Bad Sectors (system can boot normally)
Step 1: Download and install Tatasoft Disk Clone
- Start by visiting the Tatasoft website to download the software. Follow the installation instructions to set it up on your system.

Step 2: Connect your drives to clone
- ① Connect both the source drive (the one with bad sectors) and the target drive (the new drive) to your computer.
- ② Ensure that the target drive has enough space to accommodate the data from the source drive.
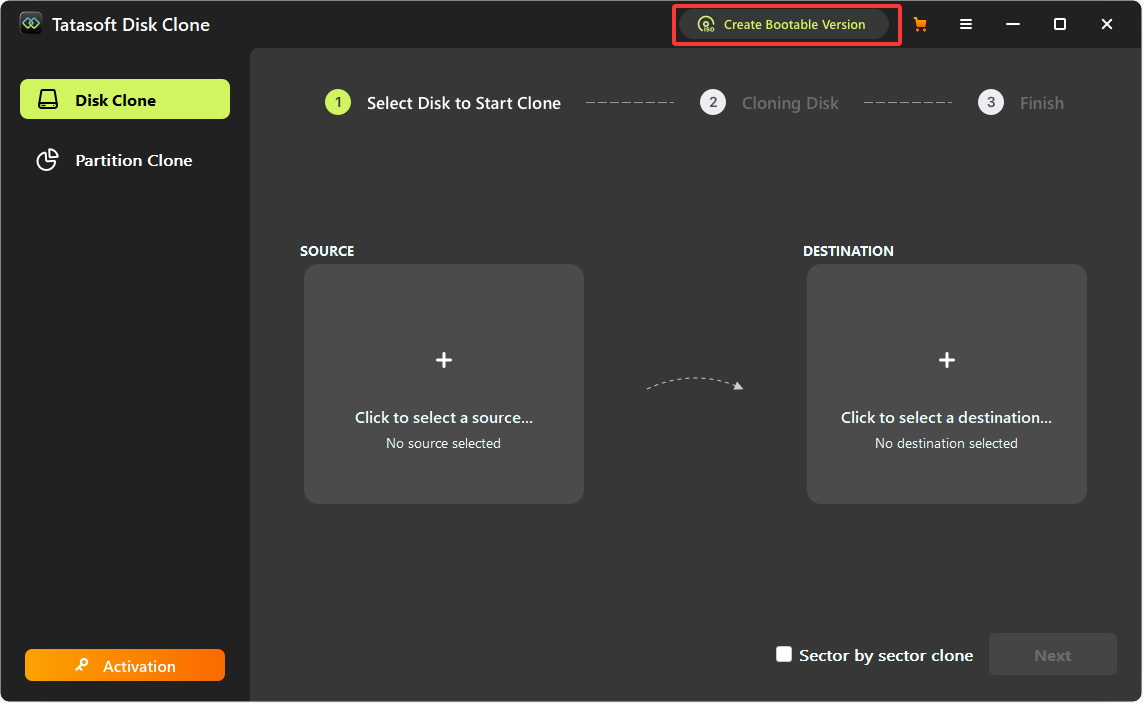
Step 3: Launch Tatasoft Disk Clone and select Disk Clone
Step 4: Select the source and destination disks for copy
- ① Select Source and Target Drives: Carefully choose your source drive (with bad sectors) and the target drive. Double-check your selections to avoid accidental data loss.
- ② Choose Clone Type: In the interface, check the option for Sector by sector cloning if you want to clone the entire disk exactly. Of course, it will ignore the bad sectors to ensure a success copy.
- ③ Click Next to continue

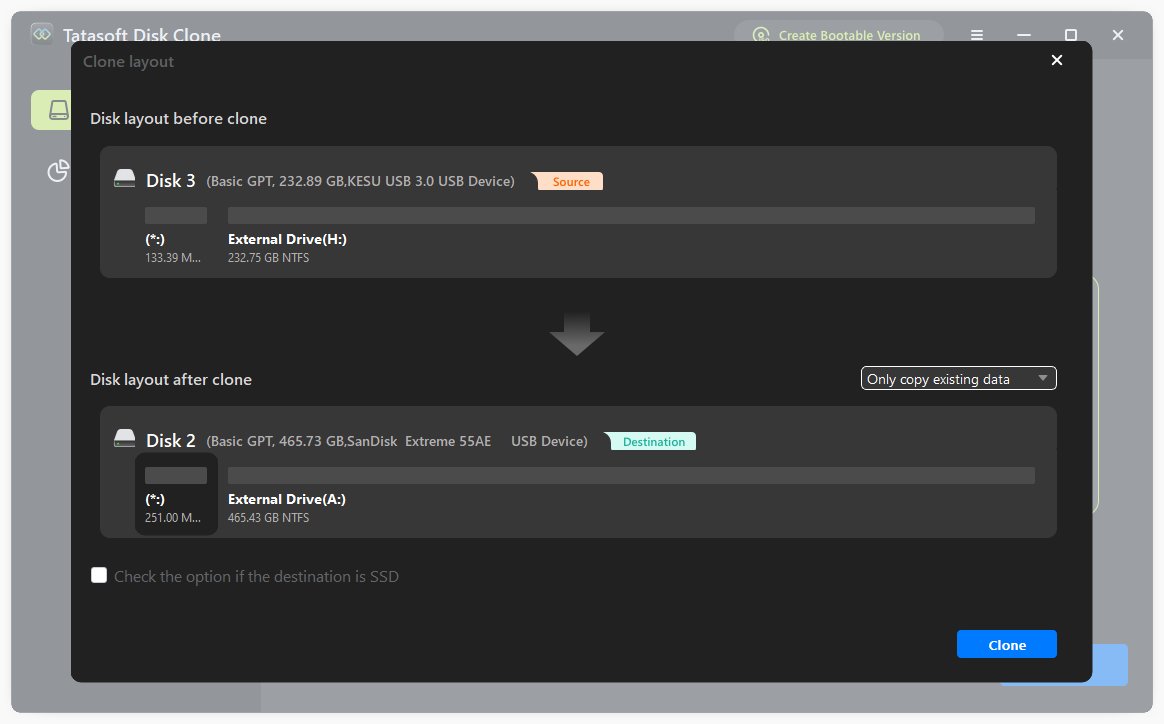
Step 5: Resize partitions on the target disk and initiate the cloning process
- ① Edit partition layout: you can freely resize the partitions on the destination disk after copy as needed.
- ② Check the option if destination is SSD for SSD optimization.
- ③ Once you confirm your selections, initiate the cloning process by clicking Clone. Tatasoft will begin copying every sector from the source drive to the target drive.
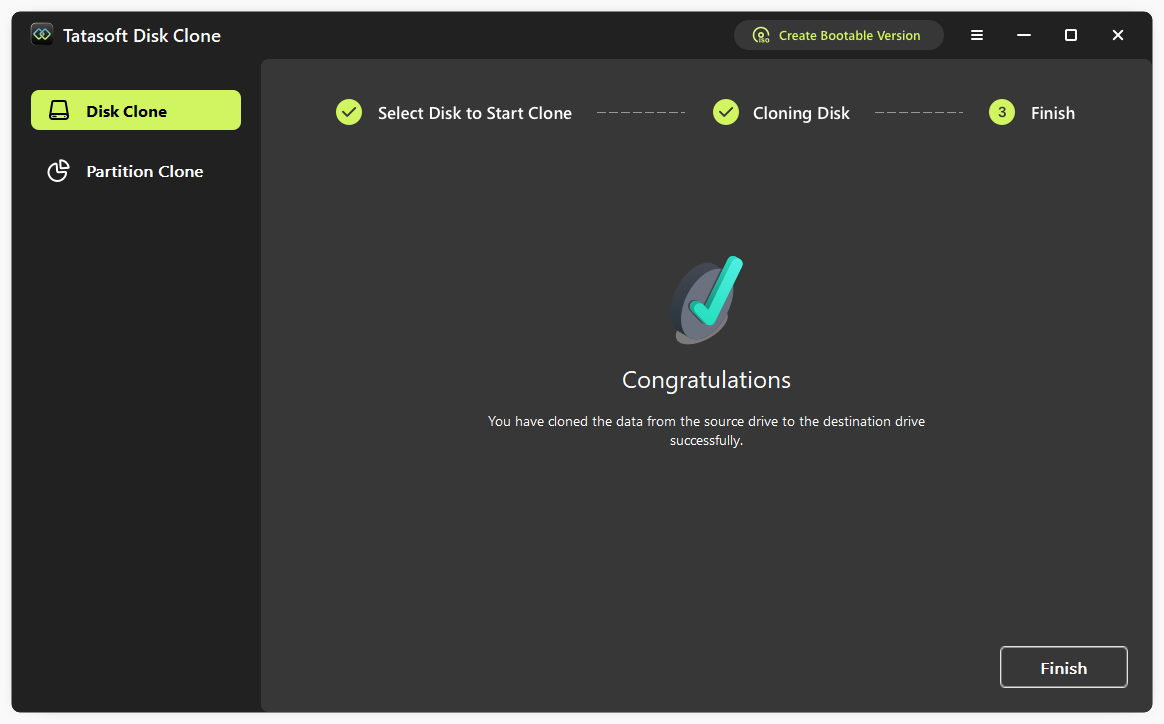
Step 6: Wait for cloning bad-sector drive and eject
- Once verification is complete, safely eject your drives. Your new drive is now a functional replica of the original, with recoverable data transferred successfully.
Method 2: Cloning a Severely Damaged Drives with Bad Sectors (System cannot boot normally)
When unrepairable physical bad sectors cause system boot failure, the copy process is slightly different and requires creating a bootable recovery disk.
Step 1: Create WinPE bootable disk of Tatasoft Disk Clone for Windows
- ① Connect external USB: Plug in a USB flash drive or external hard drive to create a bootable recovery disk.
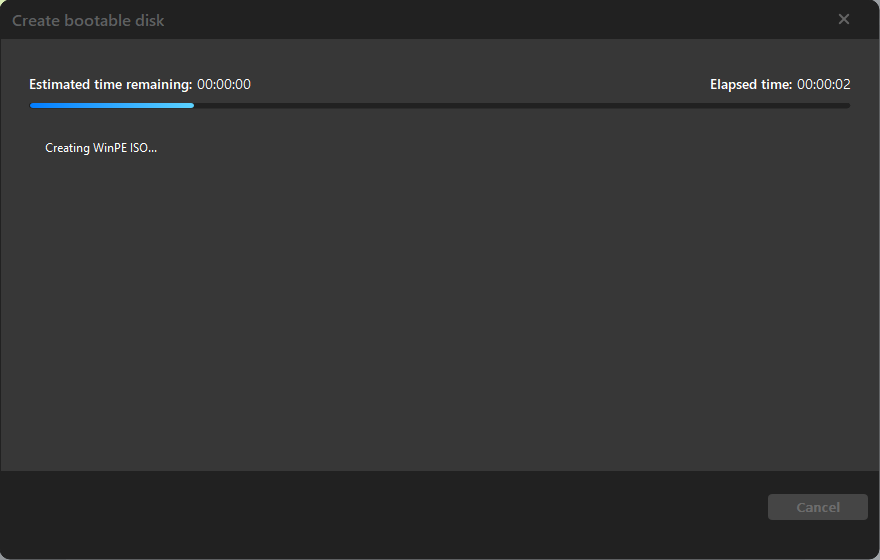
- ② Launch Tatasoft Disk Clone: Open the software and select the option to create a bootable disk. Follow the on-screen prompts to format and create the bootable media.
![Create Winpe bootable disk to copy hdd with bad sectors]()
Step 2: Boot from the Bootable Disk
- ① Connect Drives: Ensure both the bootable USB and target drive (new drive) are connected to the computer with the problematic source drive.
- ② Adjust Boot Order: Restart your computer and access the BIOS/UEFI settings by pressing F2, F10 or DEL. Change the boot order to prioritize booting from the bootable USB drive.
- ③ Once the computer boots from the USB, Tatasoft Disk Copy will launch in the WinPE environment.
Step 3: Select cloning method and disks to clone
- ① Switch to "Disk Clone" option to copy entire hdd with bad sectors.
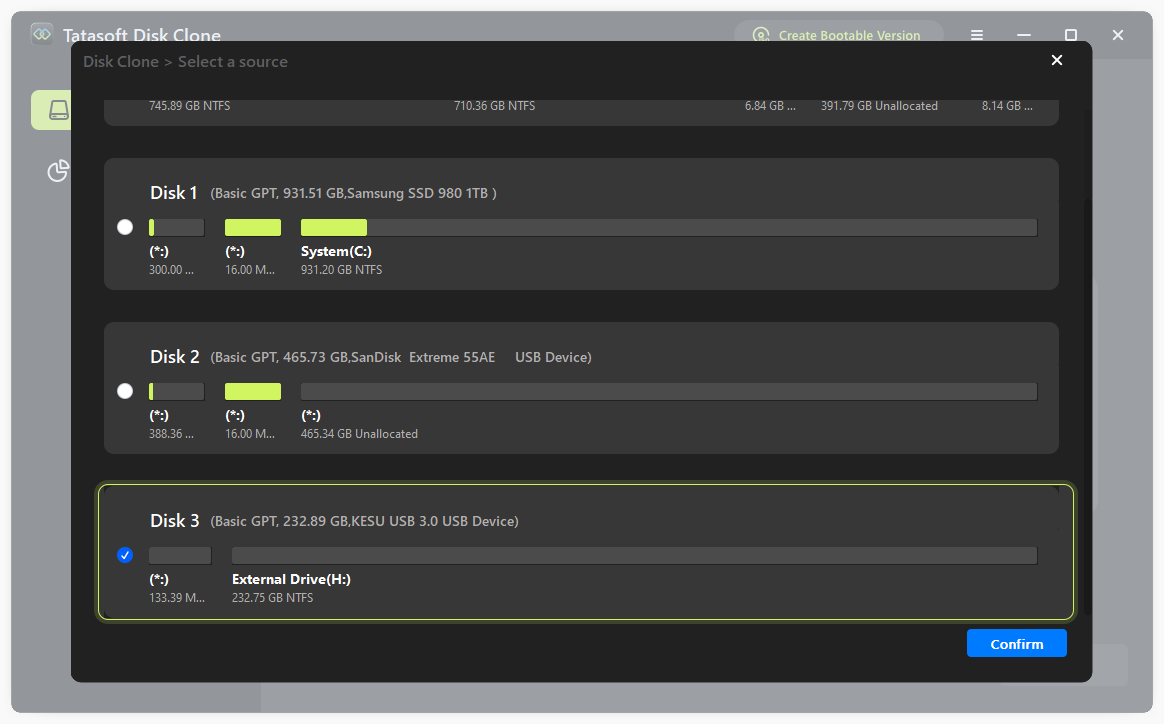
- ② Select Source Drive: Choose the problematic source drive (the one with physically bad sectors) as the source. Make sure to select the correct drive to avoid data loss.
- ③ Select Target Drive: Choose the new target drive where the data will be cloned. Verify your selections and click Next.
- ④ Enable Sector-by-Sector Copy: Ensure that the "Sector by sector copy" option is selected, which is crucial for copying data from sectors that may contain bad areas.
Step 4: Edit the disk layout on the destination disk and start cloning process
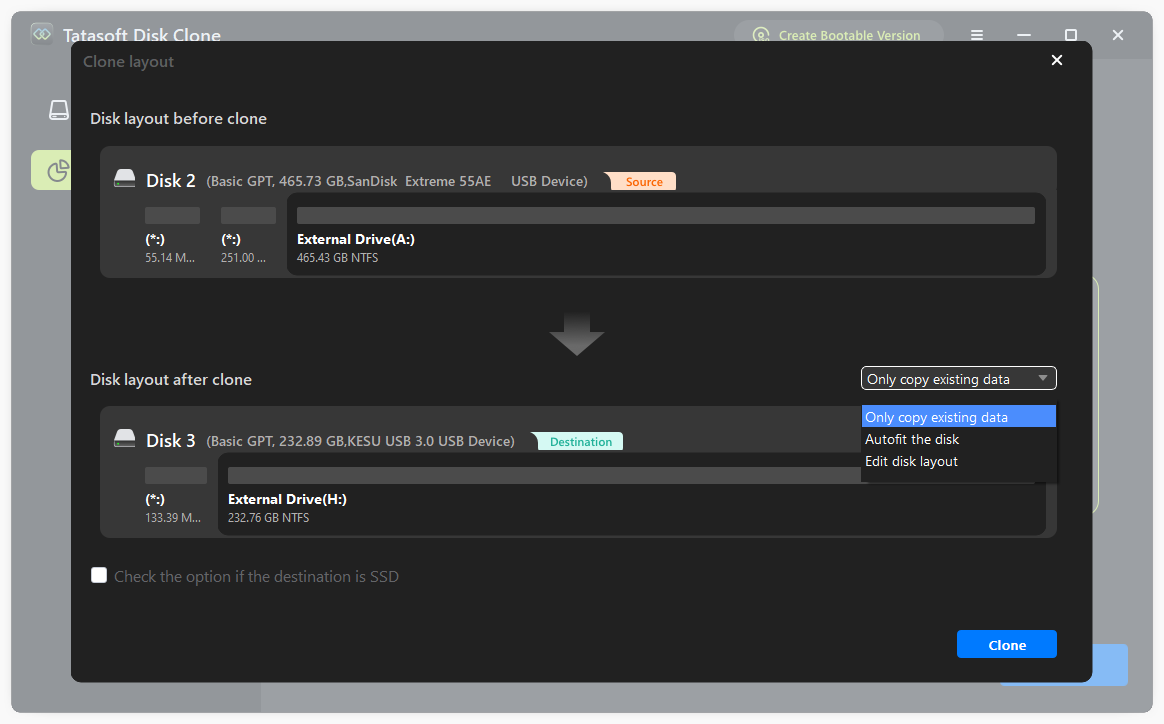
- ① Edit partition layout: you can freely resize the partitions on the destination disk as needed.
- ② Check the option if destination is SSD for SSD optimization.
- ③ Confirm and Initiate Cloning: Click "Clone" to start the cloning process. The software will attempt to copy data from the good sectors of the source drive while skipping over bad ones.
Step 5: Finish and Eject
Once cloning is complete, start your computer normally and safely eject your drives. Your new drive is now a functional replica of the original, with data transferred successfully.
Best Practices for Cloning Drives with Bad Sectors
- ① Backup Important Data: Always back up your critical data on destination disk before starting the cloning process. This precaution ensures that you have copies of essential files in case something goes wrong.
- ② Check Disk Health: Use disk management tools to assess the health of your source drive. Identifying the extent of damage can help you understand the risks involved in cloning.
- ③ Use a Stable Power Source: Ensure your computer is plugged in or connected to a reliable power source to avoid interruptions during the cloning process.
- ④ Stay Updated: Keep your Tatasoft software updated to benefit from the latest features and improvements in data recovery and cloning.
- ⑤ Monitor the Cloning Process: Keep an eye on the cloning process to ensure that it completes successfully. If you encounter errors, consult Tatasoft’s support resources for guidance.
- ⑥ Timely replacement of aging drives: When bad sectors increase rapidly or spare sectors are depleted, consider replacing the drive.
Expert Insight: Experts recommend regularly monitoring the health of your hard drives using diagnostic tools. This proactive approach allows you to identify potential issues, such as bad sectors, before they escalate. By running periodic checks, you can create backups of important data early and plan for cloning or replacing drives before they fail completely. This not only minimizes the risk of data loss but also ensures a smoother transition to new storage solutions when needed.
Common Challenges When Cloning Drives with Bad Sectors
1. Data Corruption
Cloning a drive with bad sectors can lead to data corruption if not handled properly. Tatasoft's verification feature helps mitigate this risk by ensuring that copied data is intact.
2. Time Consumption
Cloning a drive with bad sectors can take longer than a standard cloning process due to the need for data recovery. Be patient and allow Tatasoft to complete the process fully.
3. Environmental Control
Avoid high temperatures, vibrations, and sudden power loss, which accelerate drive failure.
Conclusion
Cloning a drive with bad sectors is a critical process for data recovery, protection and replacing failing hard drive, especially when dealing with aging storage devices or sudden disk failures. With Tatasoft Disk Clone for Windows, you can effectively clone your damaged drive, ensuring that recoverable data is safely transferred to a new, healthy drive. By following the outlined steps and best practices, you can navigate the challenges associated with bad sectors and safeguard your valuable information on Windows 11/10/8/7/Vista.
Related Articles
- Dec 17, 2025How to Efficiently Clone Your NTFS Drive? 2 Methods
- Dec 17, 2025How to Clone Your Disk to Larger Disk Seamlessly?
- Dec 17, 2025Clone It Right with Sector-by-Sector Disk Copy
- Feb 10, 2026How to Clone Windows 11 to a New SSD without reinstalling?
- Dec 24, 2025Clone Your Dell Laptop Hard Drive in Just 3 Steps
- Jan 02, 2026Easily Clone a Crucial Hard Drive to an SSD for Improved Computer Performance

A dedicated technical writer at Tatasoft with over four years of specialized expertise in computing technology. She crafts actionable, user-centric content for tech niches, specializing in disk cloning, data management, and video solutions for Windows and Mac.
Read full bio

This article has been approved by Ben Lee. Ben's dedication to excellence and his comprehensive knowledge of Windows and Mac technologies make him an essential part of any technical writing team. With a career marked by continuous learning and adaptation to new technologies, Ben remains at the forefront of the ever-evolving tech landscape.