Written byJanet BashorunUpdated on Dec 24, 2025
Brief introduction: Cloning your Dell laptop’s hard drive is a key task for anyone needing to upgrade storage, back up data, or migrate to a new device. This simple yet powerful procedure allows you to make an exact copy of your entire system without reinstalling, including OS, applications, and personal files. In this guide, we’ll walk you through the Dell laptop cloning process in just a few straightforward steps using Tatasoft, helping you manage data efficiently and securely.
In this article
Why Clone Your Dell Laptop Hard Drive?
Cloning a Dell laptop hard drive comes with significant advantages:
1. Data Safety: Cloning ensures that a complete backup of your system is available, which is crucial for data recovery in case of system failure or drive corruption.
2. Seamless Device Upgrades: When upgrading to a new, faster, or larger hard drive, cloning allows you to migrate your entire system without the need for reinstalls or extensive setup.
3. Time Efficiency: A cloned drive can cut down on the time spent setting up a new system, allowing you to get back to work or play quickly.
4. Data Migration: If transitioning to a new computer, cloning enables a smooth transfer of all files and settings, reducing the potential for data loss.
Preparation for Cloning Your Dell Laptop Hard Drive
Before diving into the hard drive cloning process, it’s essential to prepare correctly:
- Backup Important Data: Despite the cloning process being a backup itself, safeguard critical files in another location to prevent potential data loss, especially backup important data on the destination disk, for cloning will format it.
- Check Drive Compatibility: Ensure both your source (original hard drive) and target (new hard drive) drives are compatible and adequately connected, whether through USB or internal disk installation.
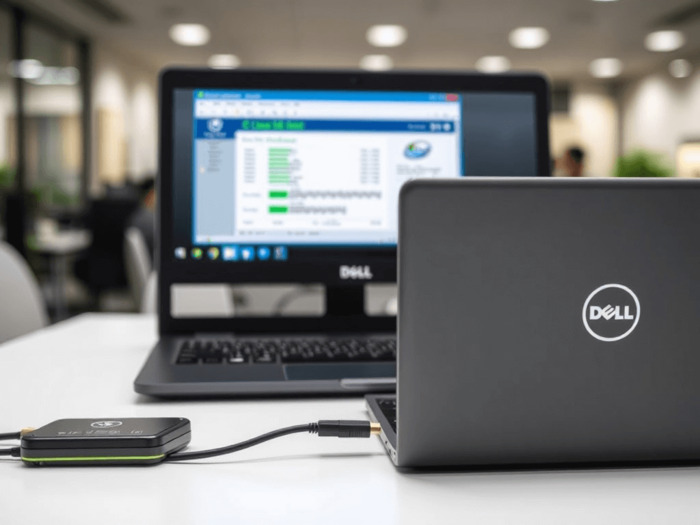
- Connect the hard drives to your Dell laptop:
✔ Internal Drive: Before replacing the existing laptop's hard drive, you need to connect the new hard drive as an external drive via USB. After cloning, disassemble the laptop to install the new drive.
✔ External Drive: For an external hard drive, simply connect it to your Dell laptop. Confirm that it appears in Windows Explorer. - Install disk cloning software: Tatasoft disk cloning software is a popular choice to clone your Dell laptop for its reliability and user-friendly interface. Download and install it on your Dell laptop.
Step-by-Step Guide to Clone Your Dell Laptop Hard Drive
Step 1: Launch Tatasoft Disk Clone and select Disk Clone
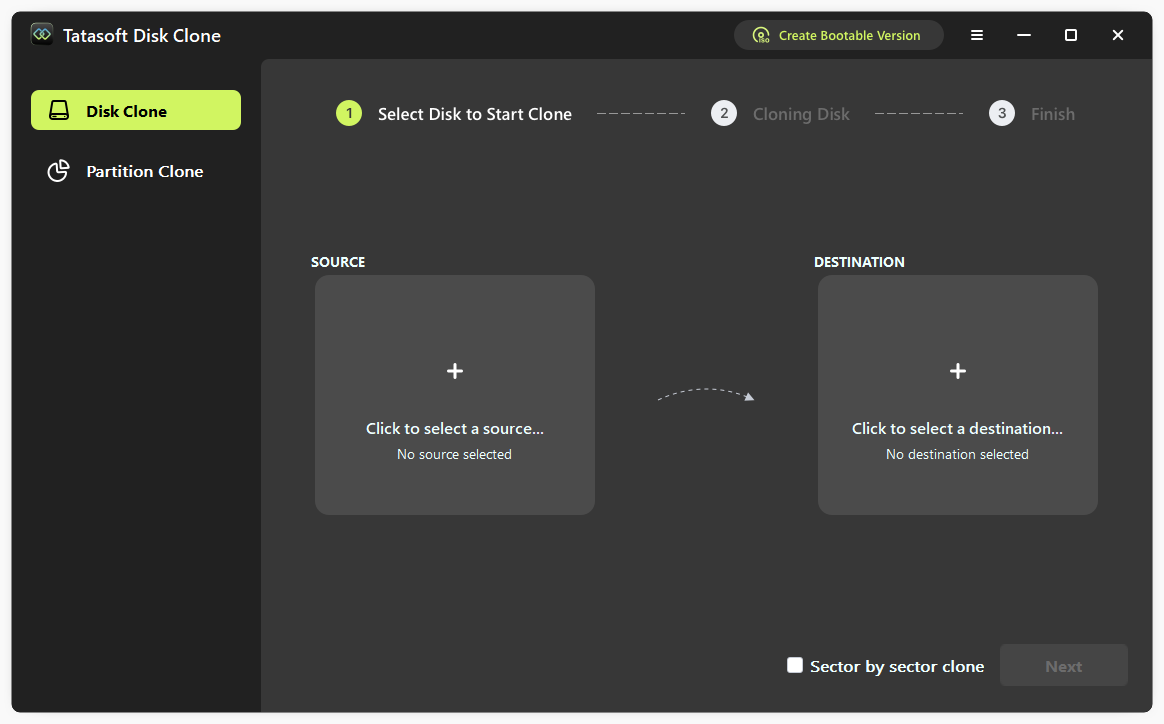
Step 2: Select source and target drives for cloning
- Source Drive: Pick your Dell laptop's existing hard drive as the source drive.
- Target Drive: Choose the new hard drive which will hold the cloned data. Be aware that this drive must be empty or have no important data, as it will be overwritten.

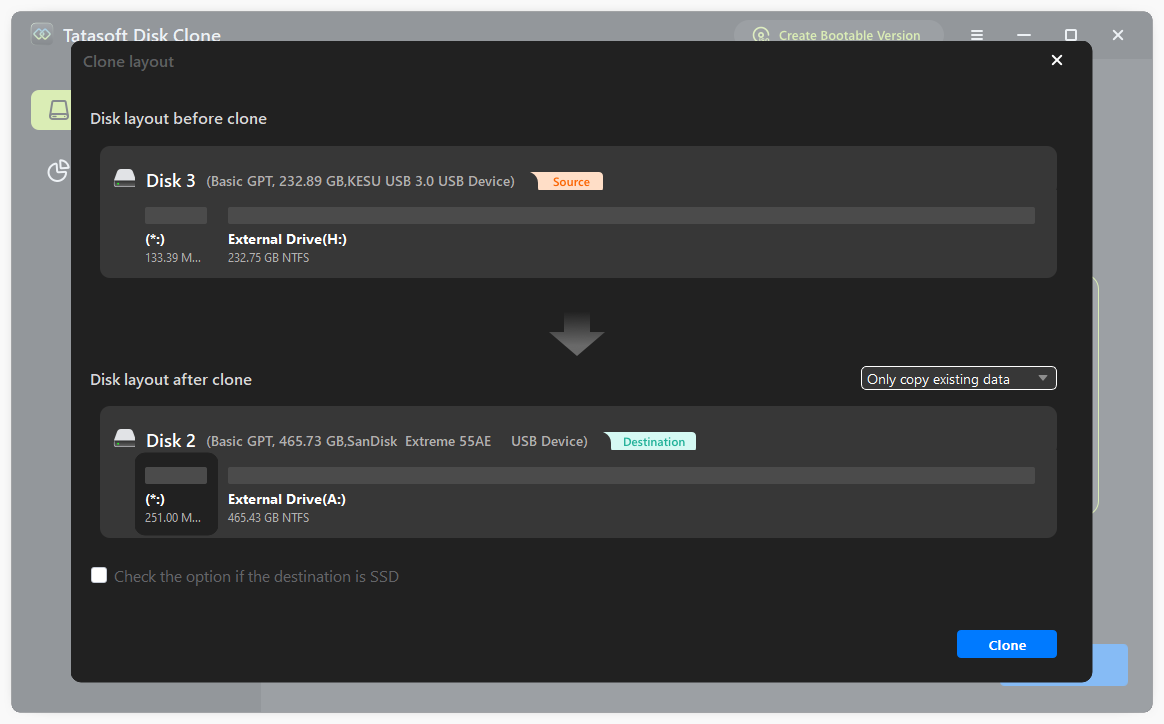
Step 3: Configure cloning options and start cloning
Before starting the cloning process, configure cloning settings:
- Edit disk layout of the destination drive: Resize partitions on the target disk as needed to utilize disk space effectively.
- Check the option if the destination is SSD: It boosts SSD speed, efficiency, and lifespan by minimizing unnecessary writes and ensuring data is stored in the most efficient way possible.
- Click Clone to begin cloning your Dell laptop hard drive. Cloning duration varies based on data size and transfer speed.
Upon completion, Check the target drive to verify that all necessary files, programs, and settings have been mirrored correctly.
Post-Cloning Tasks for Dell Laptop Hard Drives
After the cloning process is complete, there are a few important steps you should follow to ensure a successful transition:
1. Boot from the Cloned Drive:
- If the cloned drive is intended to be the primary drive for your Dell laptop, you will need to set your BIOS/UEFI settings to boot from this new drive. Restart your laptop -> Press F2 (or F12) repeatedly when the Dell logo appears -> use arrow keys to select the Boot tab -> use the + or - keys to set the cloned drive as the first boot device.
- After saving changes and exiting, the laptop should boot from the cloned drive, and you should be able to access your operating system just as you did before.
2. Verify Data Integrity:
Open several files, applications, and settings to ensure everything is functioning correctly. Check that all personal data has been carried over properly and that applications are running smoothly.
3. Check Disk Management:
Go to Windows Disk Management (right-click on Start and select "Disk Management") to verify that the new drive is partitioned correctly and reflects the expected storage capacity. If you see any unallocated space, you may need to partition it.
4. Update Drive Letters:
If necessary, adjust the drive letters since the cloned drive may have different drive assignments. You can do this through the Disk Management interface.
5. Optimize Settings:
Depending on storage types (HDD vs. SSD), you may need to enable or disable certain features to optimize performance, such as enabling TRIM for SSDs or adjusting power settings.
6. Create a Backup Schedule:
Consider implementing a backup strategy to safeguard your data. Regular backups can help you avoid data loss in the future, ensuring that you’re always prepared for unforeseen issues.
Troubleshooting Common Issues
If you encounter problems during the cloning or installation process, here are some troubleshooting tips:
1. Drive Not Recognized: If the new drive isn’t recognized, ensure all connections are secure. Rebooting the laptop may also help in some cases.
2. Cloning Software Issues: If Tatasoft fails to clone, ensure you have the latest version of the software and that both drives are properly connected.
3. Unbootable System: If your system doesn't boot after cloning, double-check that the cloning was completed successfully and that the new drive was installed properly.
Conclusion
Cloning your Dell laptop hard drive is crucial for data safety and smooth upgrades. This process allows you to create a complete backup of your system, ensuring that all applications, files, and settings are preserved. By utilizing reliable cloning software like Tatasoft, you can simplify disk cloning for Windows 11, 10, 8, 7, and Vista, making it accessible even for those with minimal technical experience.
Integrating hard drive cloning into your routine not only safeguards your data, but also streamlines a smoother transition to new hardware or higher-capacity storage. By following the steps outlined in this guide, you can confidently manage your data and boost your device’s performance.
Related Articles
- Mar 06, 2026How to Migrating Windows 10 to Smaller SSD?
- Feb 27, 2026Complete Guide to Clone SSD to SSD Effortlessly
- Feb 07, 2026Replace Hard Drive Without Reinstalling Windows: Step-by-Step Guide
- Jan 02, 2026Easily Clone a Crucial Hard Drive to an SSD for Improved Computer Performance
- Jan 20, 2026How to Copy Partition to Another Drive via CMD: A Complete Guide
- Feb 01, 2026Clone Your Hard Drive on Windows 7 with Two Quick and Easy Methods

A dedicated technical writer at Tatasoft with over four years of specialized expertise in computing technology. She crafts actionable, user-centric content for tech niches, specializing in disk cloning, data management, and video solutions for Windows and Mac.
Read full bio

This article has been approved by Ben Lee. Ben's dedication to excellence and his comprehensive knowledge of Windows and Mac technologies make him an essential part of any technical writing team. With a career marked by continuous learning and adaptation to new technologies, Ben remains at the forefront of the ever-evolving tech landscape.