Written byJanet BashorunUpdated on Jan 05, 2026
How to Clone Your Dynamic Disk to SSD to Boost Your PC Performance
Approved byBen Lee
Brief introduction: Cloning your dynamic disk to a solid-state drive (SSD) can significantly enhance your system's performance, providing faster boot times and improved application responsiveness. To clone a dynamic disk to SSD successfully, you need the right disk copy tools like Tatasoft Disk Clone for Windows. In this guide, we will walk you through the process step-by-step, ensuring a seamless disk transition without data loss.
In this article
Understanding Dynamic Disks and SSDs
What is a Dynamic Disk?
Dynamic disks are a type of disk configuration in Windows that allow for advanced features such as spanning, striping, and mirroring. Unlike basic disks, dynamic disks can manage multiple partitions and provide greater flexibility in disk management.
What is an SSD?
A Solid-State Drive (SSD) is a storage device that uses NAND-based flash memory to store data. Unlike traditional hard drives (HDDs), SSDs have no moving parts, which allows for faster data access and improved durability.
Benefits of Cloning a Dynamic Disk to SSD
- Speed: Compared with HDDs, SSDs boast markedly higher read - write speeds, which translates to improved system performance following the cloning of a dynamic disk with an operating system to an SSD.
- Reliability: With no moving parts, SSDs are less prone to mechanical failure, making them a more reliable option for data storage.
- Efficiency: Cloning allows for a direct transfer of data, preserving existing configurations and settings without the need for a fresh installation when you clone a dynamic disk.
- Lower Power Consumption: SSDs consume less power than HDDs, contributing to longer battery life in laptops and reduced energy costs for desktop systems. This efficiency is an important consideration for both personal and business users.
Preparing to Clone Your Dynamic Disk to SSD
Before you begin the cloning process, it's essential to take some preparatory steps.
1. Backup Your Data
Always begin by backing up any important files that already exist on the target SSD. Although cloning is generally a safe process, the destination disk will be formatted during the migration of a dynamic disk to an SSD.
2. Check SSD Compatibility
Ensure that your SSD is compatible with your system and has enough storage capacity to accommodate the data from your dynamic disk. Ensure that the SSD is properly connected and recognized by the computer.
3. Assess Your Dynamic Disk
Before cloning, it’s crucial to assess the contents of your dynamic disk, delete unnecessary files and apps, and identify the specific volumes and data you intend to transfer to the SSD. This preliminary check helps prevent the loss of important information during the cloning process.
4. Install Tatasoft Disk Clone for Windows
Download and install Tatasoft Disk Clone for Windows, which is specifically designed for seamless disk cloning operations, including when you clone a dynamic disk to SSD. This software provides an intuitive interface and robust features to ensure a smooth disk and partition cloning process.
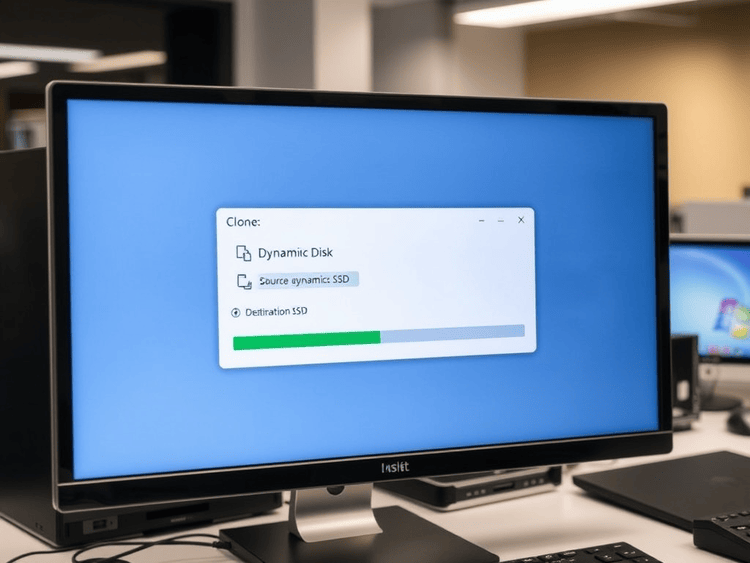
How to Clone a Dynamic Disk to SSD?
Step 1: Launch Tatasoft Disk Clone and switch to Disk Clone
Step 2: Select the source and destination drives for cloning
- In the main interface, locate the section that displays your connected disks by clinking +.
- Select the dynamic disk you wish to clone as Source.
- Next, select your SSD as the destination for the cloned data.

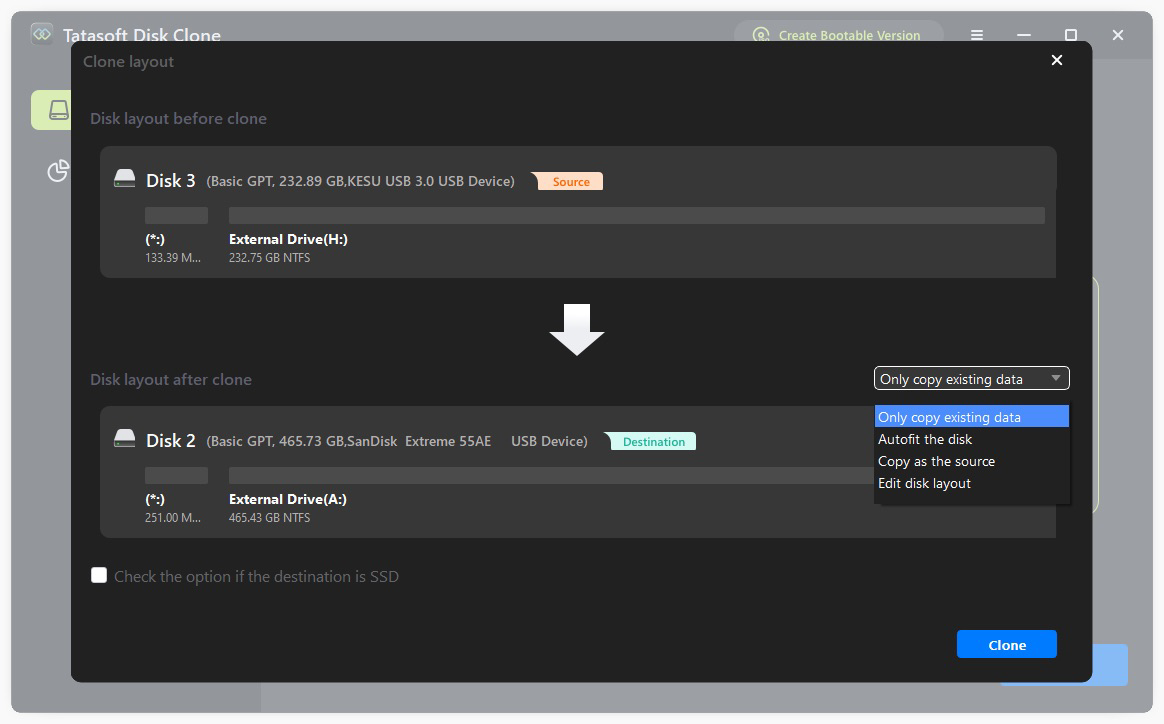
Step 3: Edit partition size on the target SSD
- Edit disk layout: Resize partitions on the target SSD as needed to utilize disk space effectively.
- Check the option if the destination is SSD: This enable 4K alignment and TRIM optimizations which boost SSD speed, efficiency, and lifespan by minimizing unnecessary writes and ensuring data is stored in the most efficient way possible.
- Once you’ve configured your settings, click on the "Clone" button to initiate the process.
Monitor the progress bar to track the cloning operation.

Post-Cloning Steps for Dynamic Disk to SSD Migration
1. Verify Data Integrity
Once cloning is complete, it’s crucial to verify that all data has been accurately transferred. You can do this by accessing files on the SSD and checking for any discrepancies after you clone dynamic disk to SSD.
2. Set the SSD as the Boot Drive if copying a system disk
In scenarios where a boot drive is migrated to an SSD for use as the primary boot device, the SSD must be configured as the default boot option in the system’s BIOS settings:
- Restart your computer and enter the BIOS setup (usually by pressing F2, DEL, or ESC during startup).
- Navigate to the Boot menu and select your SSD as the primary boot device.
- Save changes and exit.
3. Optimize SSD for Performance
To ensure your SSD performs optimally after you clone your dynamic disk to SSD, consider the following:
- Enable TRIM: This feature helps the SSD manage unused data blocks, enhancing performance and longevity. (Alternatively, select the option if the destination disk is SSD during cloning the dynamic disk to SSD.)
- Disable Disk Defragmentation: SSDs do not require defragmentation like HDDs, so ensure this feature is turned off.
4. Regular Backups
Even after cloning, continue to perform regular backups of your data. This practice ensures that your information remains safe and recoverable.
Troubleshooting Common Issues
1. Cloning Error
If you encounter errors during the cloning process, ensure that:
- Both the source and destination drives are properly connected.
- You have sufficient space on the SSD.
2. SSD Not Recognized
If your SSD is not recognized, check the following:
- Make sure the SSD is properly connected to your computer.
- Verify that your operating system supports the SSD.
3. Data Integrity Issues
If you notice missing files after cloning, try the following:
- Re-run the cloning process, ensuring you select the correct source and destination for when you clone a dynamic disk to SSD.
- Use the verification feature in Tatasoft to confirm data integrity.
Conclusion
Cloning a dynamic disk to SSD is a pivotal step in enhancing your system's performance and reliability. With Tatasoft Disk Clone, this process becomes not only straightforward but also efficient. By following the detailed steps outlined in this guide, you can seamlessly transfer your Windows OS and data, and enjoy the significant speed and responsiveness that SSDs offer.
Upgrading to an SSD will not only improve boot times and application performance but also provide a more reliable storage solution for your important files. Don’t wait any longer—download Tatasoft disk cloning software today and take the first step towards a faster, more efficient computing experience!
Related Articles
- Jan 08, 2026Maximize Your HP Laptop's Potential by Upgrading to an SSD
- Dec 17, 2025Your Go-To Alternative to Clonezilla for Disk Cloning
- Feb 09, 2026Migrate Windows 11 to SSD with Ease - Boost Your PC Performance
- Dec 24, 2025Clone Your Dell Laptop Hard Drive in Just 3 Steps
- Dec 17, 2025The Ultimate Guide to Cloning Your HDD to an NVMe SSD
- Dec 17, 2025How to Efficiently Clone Your NTFS Drive? 2 Methods

A dedicated technical writer at Tatasoft with over four years of specialized expertise in computing technology. She crafts actionable, user-centric content for tech niches, specializing in disk cloning, data management, and video solutions for Windows and Mac.
Read full bio

This article has been approved by Ben Lee. Ben's dedication to excellence and his comprehensive knowledge of Windows and Mac technologies make him an essential part of any technical writing team. With a career marked by continuous learning and adaptation to new technologies, Ben remains at the forefront of the ever-evolving tech landscape.