Written byJanet BashorunUpdated on Feb 04, 2026
Brief introduction: Clone C drive to new SSD with ease to boost system speed, expand storage, or secure a full backup. This process captures your entire OS, applications, and files for a seamless transition. In this guide, we’ll show you how Tatasoft Disk Clone for Windows simplifies the partition copy process for a faster, more reliable PC.
In this article
Benefits of Cloning Your C Drive to a New SSD
Cloning is the process of creating an exact copy of the source C drive, including all files, settings, and the operating system. This method captures the entire disk structure, making it possible to replicate system configurations and applications. The software reads the data on the source drive and writes it directly to the destination drive, ensuring all information is preserved in its original format. It is particularly useful when you want to migrate your operating system to an SSD without reinstalling everything from scratch.
Why Choose an SSD for Your C Drive?
Upgrading from a traditional HDD to a Solid State Drive (SSD) offers:
- Improved Speed: SSDs have faster read and write speeds, significantly improving boot times.
- Durability: With no moving parts, SSDs are more resistant to physical shock and damage.
- Energy Efficiency: SSDs consume less power, which can lead to longer battery life in laptops.
- Data Preservation: Cloning ensures all critical files and software are preserved.
Preparing for Cloning C Drive to a New SSD
1. Check System Compatibility: Verify that your computer hardware and BIOS/UEFI settings support the new SSD. Check the specifications for compatibility with the new SSD you plan to install.
2. Clean Up C Drive Junk: To speed up the process, delete temporary files and system junk from your C drive. Reducing the amount of data ensures a more efficient partition copy.
3. Backup the Destination Disk: The cloning process will completely overwrite and format the target SSD. If you have any existing data on the new SSD, back it up to an external drive or cloud storage before proceeding.
4. Gather Necessary Tools:
- Tatasoft Disk Clone for Windows: Download the professional partition copy software for a seamless experience.
- Connection Hardware: Ensure you have the correct SATA, USB, or M.2 cables to connect your new drive. Or use an external hard drive enclosure to connect the SSD to your computer as a portable drive.
- External SSD: Ensure you have a compatible SSD with enough storage capacity.
Step-by-Step Guide to Clone Your C Drive to a New SSD
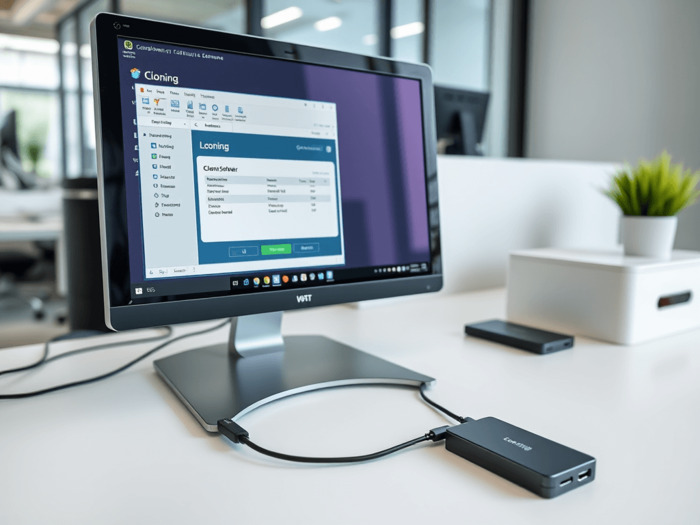
Step 1: Install Tatasoft Cloning Software
Step 2: Connect Your New SSD
Connect the new SSD to your computer using a USB or SATA cable, or use an external hard drive enclosure to connect it as a portable drive.
Step 3: Launch Tatasoft and Select Partition Clone
Pro Tip for a Bootable System: If your current system has a System Reserved Partition or an EFI partition, we highly recommend using the Disk Clone feature instead of just copying partitions. This ensures that all boot-related data is transferred correctly, making the new SSD 100% bootable.
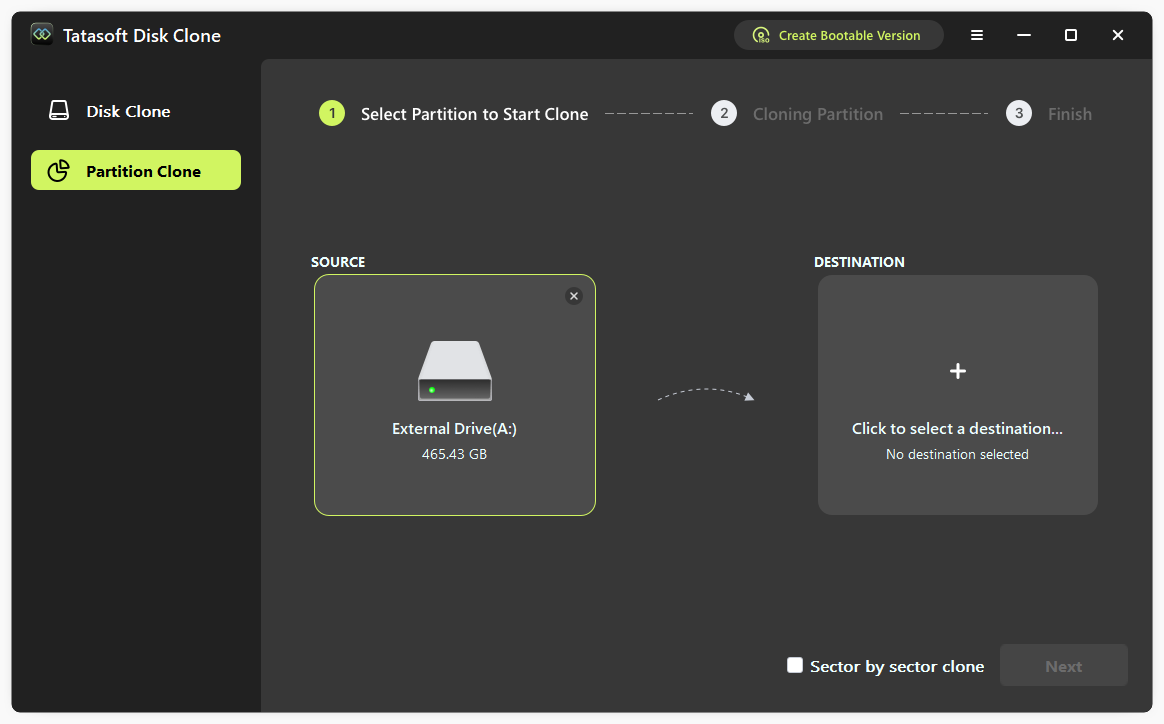
Step 4: Choose Source and Destination Drives
- Source: Select the original disk containing your C drive.
- Destination: Select the new, connected SSD.
- Confirmation: Ensure you have selected the correct target to avoid data loss on other drives.

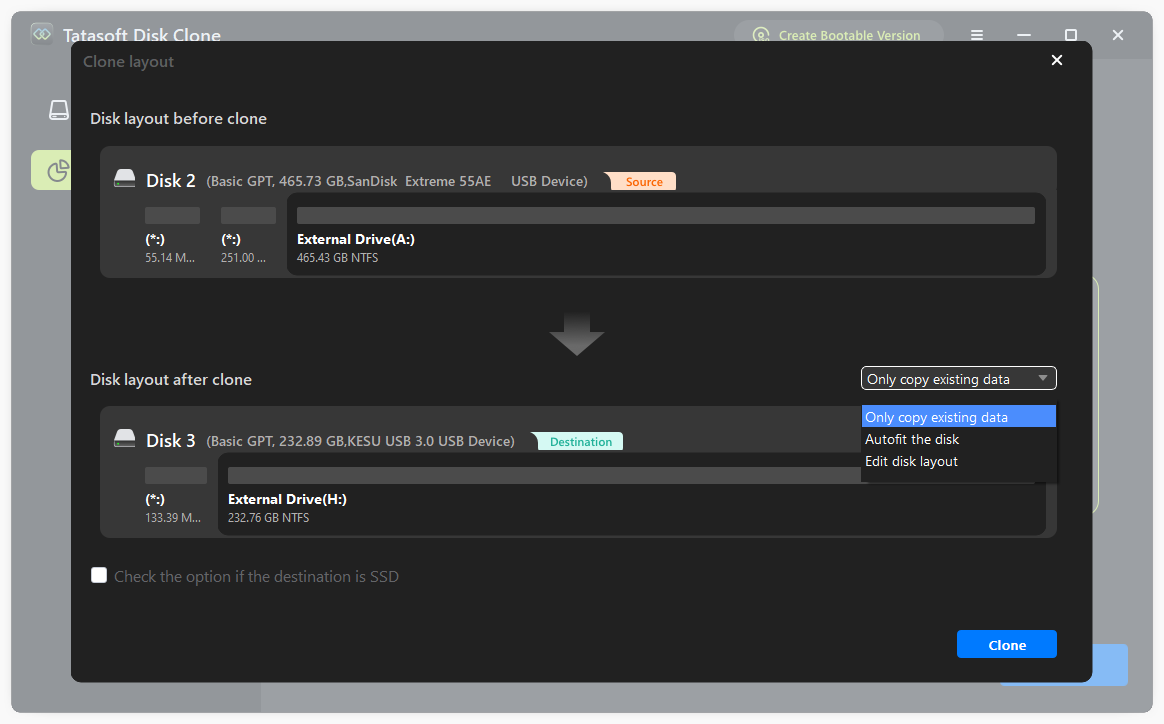
Step 5: Start the Partition Cloning Process
- You can adjust the partition size on the destination disk as needed.
- Check the SSD optimization option to enable TRIM and 4K alignment for improved SSD performance.
- Initiate Cloning: Click the “Clone” button to start the process. This may take some time depending on the amount of data.
Once you receive the completion notification, restart your computer. Enter the BIOS/UEFI settings to set the new SSD as the primary boot device. This is the final step to successfully clone system partition to a new SSD and enjoy enhanced speed.
Essential Post-Cloning Steps: Ensure Success & Peak Performance
After you clone C drive to new SSD, follow these essential steps to ensure your system boots correctly and runs at maximum speed:
1. Change BIOS/UEFI Boot Order (Crucial)
The most common reason a computer won't boot after cloning is that it is still trying to boot from the old drive.
- Action: Restart your PC and tap the BIOS key (F2, F12, or Del). Go to the Boot tab and set your new SSD as the primary boot device (Option #1).
- Tip: If the clone was successful, your computer should load Windows immediately from the new drive.
2. Enable TRIM Support
TRIM is vital for maintaining the speed and lifespan of an SSD. It helps the OS inform the SSD which data blocks are no longer in use. Tatasoft has provided this option during the cloning process.
- Action: Open Command Prompt as Administrator and type fsutil behavior query DisableDeleteNotify. If the result is 0, TRIM is enabled. If not, Tatasoft Disk Clone for Windows users should ensure their system settings are optimized for SSD performance.
3. Verify Alignment and Partition Status
A successful hard drive to SSD migration should result in "4K alignment."
- Action: Use System Information (msinfo32) to check if the partition starting offset is divisible by 4096. This ensures the best read/write speeds for your cloned NTFS drive.
4. Deal with the Old Drive
Once you’ve confirmed the new SSD is stable for a few days:
- Action: You can format the old C drive to use it as secondary storage. However, keep the old drive untouched until you are 100% sure the cloned new SSD is working perfectly.
5. Monitor SSD Health Regularly
Use professional tools to monitor the health and temperature of your new drive. Regular maintenance ensures that your partition copy software investment continues to pay off with a fast, stable system.
Conclusion
Clone C drive to new SSD with ease to instantly boost your system speed and secure your data. By following the steps in this guide - from cleaning up system junk to selecting the professional Tatasoft Disk Clone for Windows - you ensure a seamless transition without the need to reinstall your OS or applications.
Remember, for systems with a System Reserved Partition, using the Disk Clone feature is the most reliable way to move OS to an SSD and guarantee it remains bootable. Whether you are looking to clone Windows 11 to a new SSD or simply want a faster computing experience, professional software makes the difference.
Related Articles
- Dec 17, 2025Don't Lose Your Data; Clone Drives with Bad Sectors Successfully
- Feb 10, 2026Expert Tips for Cloning Your Hard Drive for Free Using Command Prompt (CMD)
- Feb 02, 2026How to Clone HDD to USB Drive on Windows?
- Jan 05, 2026How to Clone Your Dynamic Disk to SSD to Boost Your PC Performance
- Jan 13, 2026A Simple Guide to Clone Bootable USB to Another Drive
- Jan 02, 2026Easily Clone a Crucial Hard Drive to an SSD for Improved Computer Performance

A dedicated technical writer at Tatasoft with over four years of specialized expertise in computing technology. She crafts actionable, user-centric content for tech niches, specializing in disk cloning, data management, and video solutions for Windows and Mac.
Read full bio

This article has been approved by Ben Lee. Ben's dedication to excellence and his comprehensive knowledge of Windows and Mac technologies make him an essential part of any technical writing team. With a career marked by continuous learning and adaptation to new technologies, Ben remains at the forefront of the ever-evolving tech landscape.