Written byJanet BashorunUpdated on Jan 13, 2026
Brief introduction: Effortlessly clone a bootable USB to another for a reliable backup of crucial software, OS, or installation files. This creates an exact copy for easy file transfer, OS installation, or system recovery. In this guide, we’ll walk you through how to clone a bootable USB using Tatasoft Disk Clone, securing your data and keeping the cloned USB bootable.
In this article
Understanding Bootable USBs
A bootable USB drive is equipped with an operating system or installation files that can start or "boot" a computer. Users often utilize these drives to:
- Install Operating Systems: Quickly set up systems with the desired OS.
- Repair Systems: Troubleshoot and fix issues by booting from a recovery environment.
- Transfer Data: Move files between systems when traditional methods are inadequate.
Cloning a bootable USB to another is a critical skill for anyone relying on bootable drives for system recovery, software deployment, or portable operating systems. Unlike regular file copying, clone boot disk to another requires preserving the drive’s boot sector, partition table, and all data—ensuring the cloned USB functions exactly like the original. These contents can’t be duplicated via manual methods like Ctrl+C + Ctrl+V.
- Data Protection: Cloning creates a backup of personalized OS environments, pre-installed software, safeguarding against data loss.
- Easy Installation: If you frequently set up systems, having multiple copies of a bootable USB simplifies the installation process.
- Rapid Recovery: In the event of a system failure, having an extra bootable USB ensures you can quickly recover your system without losing valuable time. If the original USB is lost, damaged, or infected by malware, a cloned copy ensures you have an immediate replacement.
- Upgrade to a Larger or Faster USB: If your original bootable USB runs out of space (e.g., for new OS images or tools), cloning to a larger drive (e.g., 32GB → 64GB) retains all bootable data and adds room for updates. For faster performance, clone to a USB 3.2 or SSD-based USB—no need to rebuild the drive from scratch.
Prerequisites for Cloning a Bootable USB
Before you begin, ensure you have the following:
- A computer with Windows 10/11.
- The original bootable USB drive you wish to clone.
- A new USB drive that will serve as the destination for the cloned data. It should have enough disk space to hold all the data on the source
- Reliable USB cloning software like Tatasoft Disk Clone for Windows installed on your computer.
- Stable Power Supply: Connect your computer to a power source to prevent interruptions during cloning.
- USB Ports: Use USB 3.0 ports for faster transfer speeds (compatible with USB 2.0, but slower).
Step-by-Step Guide to Clone a Bootable USB to Another
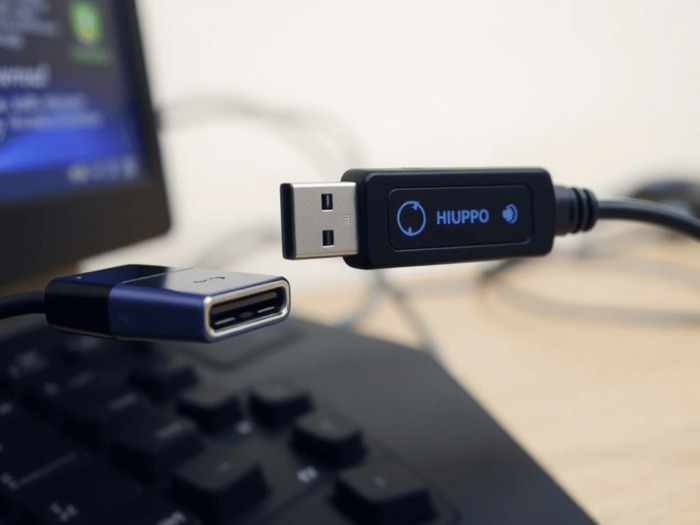
Step 1: Connect both USB drives
- Insert the Original USB: Plug in the original bootable USB drive into your computer.
- Insert the Destination USB: Connect the new USB drive that will receive the cloned data.
- Verify Connections: Ensure both drives are recognized by the operating system. You can check this in "This PC" or "File Explorer”.
Step 2: Launch Tatasoft Disk Clone and select Disk Clone
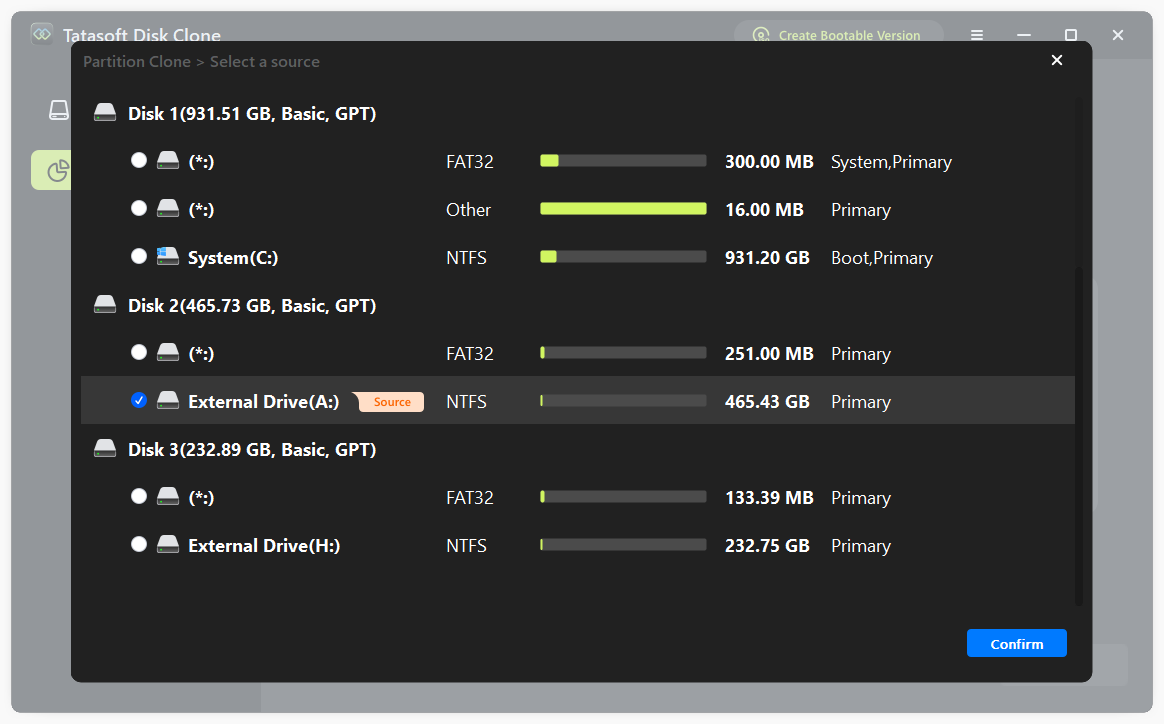
Step 3: Choose Source and Destination USB Drives for cloning
- Select Source Drive: From the list of available drives, choose your original bootable USB drive. Double-check to ensure you select the correct one, as data loss can occur if the wrong drive is selected.
- Destination Drive: Next, select the destination USB drive where you want to clone the bootable USB.
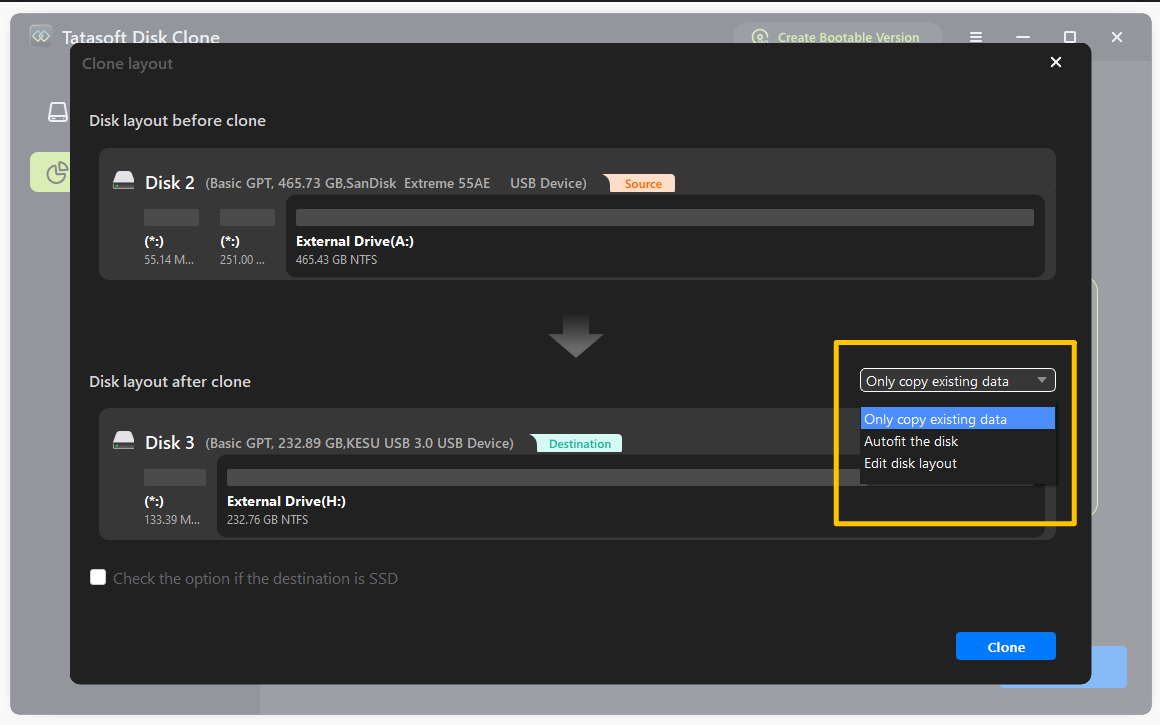
Step 4: Configure USB cloning settings
- Edit disk layout: Resize partitions on the target USB drive as needed to utilize disk space effectively. Or select Autofit the Disk to automatically optimize the partition layout based on the destination disk's size for optimal performance.
Allow the software some time to complete the cloning process. The duration will depend on the size of the data being cloned. Once finished, you will receive a notification indicating the process is complete.
Safely Eject Both USB Drives
To avoid data loss or corruption, make sure to safely eject both USB drives. Right-click on the USB drive icons in "This PC" or "File Explorer" and select "Eject" before physically disconnecting them from your computer.
Expert Insight: In a data-critical era, cloning bootable USBs boosts technical skills and helps handle unexpected computer issues. Mastering this with reliable tools like Tatasoft cloning software protects your data and enables efficient system migration and recovery. Make cloning a routine, and your data management will stay robust and reliable.
Tips for Successful USB Cloning
Ensuring a smooth cloning process is crucial. Here are some tips to enhance your experience:
- Check Drive Compatibility: Ensure that the destination USB drive has sufficient capacity to hold all the data from the source drive, typically at least equal to the size of the source USB.
- Use High-Quality USB Drives: Investing in reliable USB drives can prevent issues related to data corruption and loss.
- Avoid Interruptions: Do not unplug the USB drives or shut down the computer during cloning—this will corrupt the target USB.
- Verify Bootability: After cloning, test the target USB by booting it on a computer. Restart the computer, press the boot menu key (F12, F2, Esc—varies by manufacturer), and select the target USB. If it boots successfully, the clone worked.
Troubleshooting Common Issues
While the cloning process is straightforward, users might encounter some issues. Here are some common problems and their solutions:
1. USB Drive Not Detected:
- Ensure the USB is properly connected.
- Try different USB ports on your computer.
2. Insufficient Space on Destination Drive:
- Check the available space on the destination USB drive and ensure it is larger than the source bootable USB's data.
- Remove unnecessary files from the source USB if needed.
3. Cloning Fails:
- If the cloning process gets stuck, close any other programs that are using the USB drives, or try switching to a different USB port.
- Restart the Tatasoft software and try the cloning process again.
Conclusion
Cloning a bootable USB to another is a simple process using Tatasoft disk cloning software, and it saves you time from recreating bootable media. You can ensure that your important systems and software are backed up efficiently. This simple yet effective method not only protects your data but also simplifies the process of installing or repairing operating systems.
Whether you're preparing for a system migration, setting up multiple machines, or simply creating a backup, mastering the process of cloning a bootable USB can streamline your tasks.
Related Articles
- Dec 17, 2025Clone It Right with Sector-by-Sector Disk Copy
- Dec 17, 2025How to Clone Your Old Computer to a New One: Step-by-Step Guide
- Dec 17, 2025How to Clone Desktop Operating System to SSD for Optimal Performance
- Jan 01, 2026How to Seamlessly Clone an SD Card on Windows 10/11?
- Dec 17, 2025Essential Techniques for Cloning Your Hard Drive in Windows 11
- Jan 27, 20263 Methods to Effortlessly Clone Windows 10 to SSD

A dedicated technical writer at Tatasoft with over four years of specialized expertise in computing technology. She crafts actionable, user-centric content for tech niches, specializing in disk cloning, data management, and video solutions for Windows and Mac.
Read full bio

This article has been approved by Ben Lee. Ben's dedication to excellence and his comprehensive knowledge of Windows and Mac technologies make him an essential part of any technical writing team. With a career marked by continuous learning and adaptation to new technologies, Ben remains at the forefront of the ever-evolving tech landscape.