Written byJanet BashorunUpdated on Mar 18, 2026
Brief introduction: Cloning NVMe SSD to NVMe is an essential task for users looking to upgrade their storage or transfer data efficiently. Whether you’re upgrading to a larger SSD or simply want a backup of your current drive, using the right tools can simplify the process. This guide will walk you through the steps of cloning NVMe SSDs without reinstalling using Tatasoft Disk Clone, ensuring your data remains secure and accessible.
In this article
Why Clone NVMe SSD to NVMe?
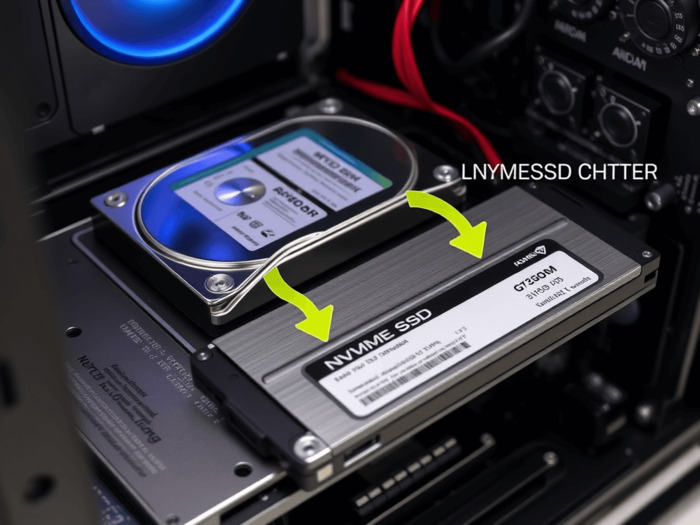
I’ve been there: your "C: Drive" is glowing red, your 256GB drive is at 95% capacity, and your Windows system is starting to crawl. You bought a shiny new 2TB NVMe drive, but the thought of losing your configurations, licensed software, and local files is paralyzing. Cloning NVMe SSD is your secret weapon. By choosing to fully clone bootable NVMe SSD to another bigger NVMe SSD, you can bypass the tedious hours of Windows reinstallation and driver updates, moving your entire digital environment to a faster, larger drive in one seamless session.
NVMe technology utilizes the PCIe interface to significantly increase read and write speeds compared to traditional SATA drives. This results in quicker boot times and improved system performance.
Common scenarios for this specific upgrade include:
- Upgrading Storage: Transitioning to a high-capacity NVMe SSD without losing data or settings.
- System Migration: Moving your Windows OS and complex applications to a new drive flawlessly.
- Data Security: Creating an exact clone as a physical backup against drive failure.
- Performance Scaling: Leveraging NVMe's ability to support multiple queues for better multi-tasking.
Required Tools for Cloning NVMe SSD
To get this right the first time, you need two things:
1. The Hardware: Your target NVMe SSD and, if your motherboard only has one M.2 slot, you might need to clone SSD with only one slot using an external NVMe-to-USB enclosure.
2. The Software: I recommend Tatasoft Disk Clone. It’s built specifically to handle the complexities of disk structures, including cloning GPT disks and even cloning dynamic disks to SSD.
Pre-Cloning Checklist
1. Backup Important Data: Always back up critical data on your target NVMe drive before starting. It will be formatted during the cloning process.
2. Audit Your Data: Before you clone your SSD to aother SSD, clean your system and delete junk files you don't need. It makes the process faster.
3. Install Tatasoft Disk Clone: Download and install the latest version of Tatasoft Disk Clone from the official website.
4. Connect the target NVMe SSD
- Internal Installation: If you’re replacing the existing NVMe SSD, ensure your computer is powered off and disconnect it from the power source. Open your device and install the new SSD.
- External Installation: If using an external enclosure for the new SSD, connect it to your computer via USB.
5. Power Up: If you are on a laptop, stay plugged into power
Step-by-Step Guide to Clone NVMe SSD to NVMe
Step 1: Open Tatasoft Disk Clone and select Disk Clone option
This mode is essential if you want to clone your system SSD while keeping the drive bootable
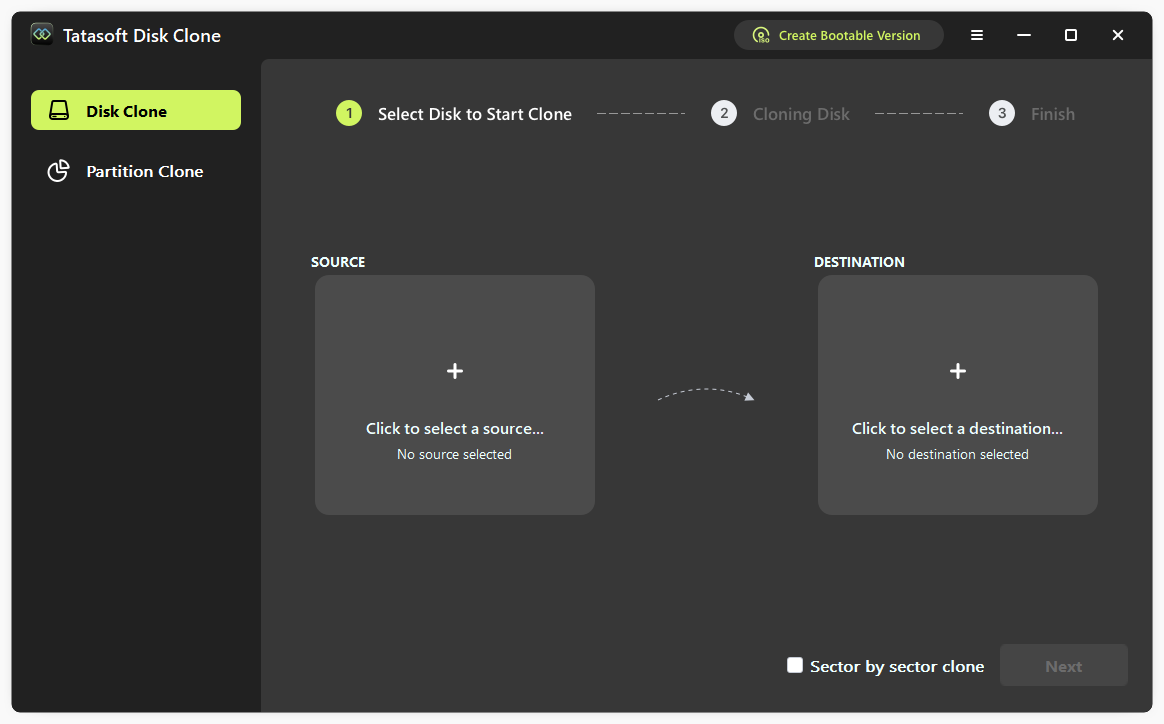
Step 2: Assign source and destination NVMe SSDs for cloning
- Select Source Drive: From the list of available drives, select your existing NVMe SSD.
- Select Destination Drive: Choose your new NVMe SSD as the destination. Double-check this! Cloning erases everything on the destination drive.

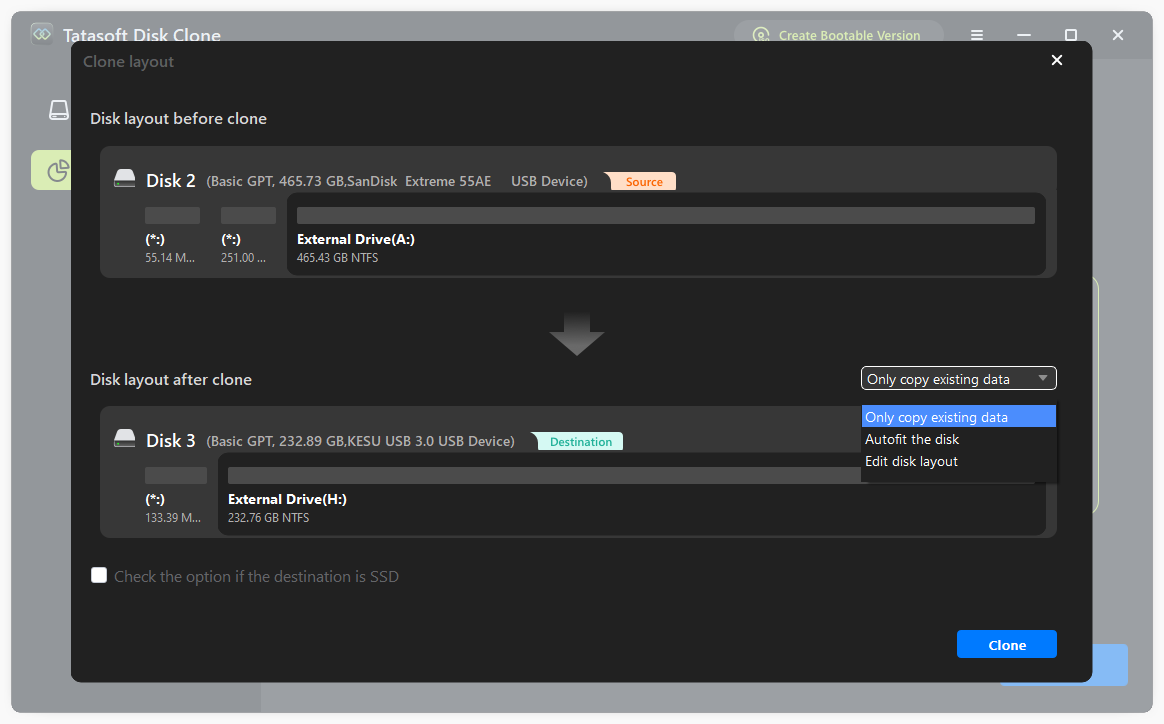
Step 3: Adjust Partition Layout (optional)
If you are moving to a larger drive, you can use Autofit the disk to automatically expand your partitions. This is a key step when you clone SSD to a larger SSD and ensures Windows sees the full capacity immediately rather than leaving the extra space as "unallocated". You can resize the partitions on the target NVMe SSD manually by selecting Edit disk layout.Pro Tip: Always check the box "Check the option if the destination is SSD". This ensures 4K alignment and enables TRIM, which is vital for the performance and longevity of NVMe drives.
Step 4: Start the SSD Cloning Process
Click Clone to begin. Once finished, you will receive a notification.

It’s essential to verify that the data has been cloned successfully before swapping them:
- Check Data Integrity: Open files on the new NVMe SSD to ensure everything has transferred correctly.
- Boot from the New SSD: If replacing the old drive, boot your system from the new NVMe SSD to confirm it works properly.
Troubleshooting & NVMe SSD Optimization
Boot Issues: This is often a BIOS/UEFI configuration issue. Enter your BIOS (usually by pressing F2, F12, or Del during startup) and ensure the new NVMe SSD is at the top of the Boot Priority list. Also, ensure your boot mode (UEFI vs. Legacy) matches the partition style (GPT vs. MBR) of your clone.
Insufficient Space: If you get a space error, delete unnecessary files from the source drive before re-cloning.
New SSD Not Showing Full Capacity: If your 2TB drive only shows 500GB after cloning, it means the partitions weren't resized. You can fix this by using Tatasoft's Autofit the disk option during a re-clone or by manually extending the volume in Windows Disk Management.
Optimizing Your New Drive: To maintain peak performance, you should ensure TRIM is active. You can verify this in the Windows Command Prompt by running:
fsutil behavior query DisableDeleteNotify
If the result is DisableDeleteNotify = 0, TRIM is enabled. If you checked the SSD optimization option during the cloning process in Tatasoft, the software automatically enables TRIM and 4K alignment for you.
Conclusion
Whether you are performing a HDD to NVMe SSD migration or just moving to a larger NVMe, the goal is the same: zero downtime. Modern NVMe drives are incredibly reliable, but they are only as good as the software you use to manage them. With Tatasoft Disk Clone, you have a powerful tool that simplifies data transfer while ensuring a smooth transition to your new SSD without the hassle of losing important files or reinstalling applications.
Ready to give your PC a new lease on life? Download Tatasoft Disk Clone today and experience the speed you've been missing.
Related Articles
- Dec 17, 20253 Steps to Clone System to New Hard Drive
- Mar 04, 2026Essential Techniques for Cloning Your Hard Drive in Windows 11
- Feb 08, 2026Top 8 Disk Cloning Software in 2026: Free & Paid
- Dec 17, 2025How to Successfully Copy Ext4 Partitions on Windows? 3 Methods to Try
- Jan 05, 2026How to Clone Your Dynamic Disk to SSD to Boost Your PC Performance
- Feb 10, 2026How to Clone Windows 11 to a New SSD without reinstalling?

A dedicated technical writer at Tatasoft with over four years of specialized expertise in computing technology. She crafts actionable, user-centric content for tech niches, specializing in disk cloning, data management, and video solutions for Windows and Mac.
Read full bio

This article has been approved by Ben Lee. Ben's dedication to excellence and his comprehensive knowledge of Windows and Mac technologies make him an essential part of any technical writing team. With a career marked by continuous learning and adaptation to new technologies, Ben remains at the forefront of the ever-evolving tech landscape.